Sleeping Bag Zipper Repair: Make it Close Even After it Refuses to
After a long day of hiking and camping, all you want to do is set up your camp and cuddle into your sleeping bag. Most of the time, it is just that simple, but every now and then as you unzip the side, your zipper just won’t seem to work. Sleeping bags become quite useless when you can’t seal yourself in for warmth, or can’t get out of your mummy bag in the morning!
These catastrophes can be easily fixed, or even avoided with a few tricks on how to fix your bag’s zipper. Rather than drop more money on a brand new sleeping bag, we are going to teach you a few basics of sleeping bag zipper repair so that you can stay warm and comfortable on many more adventures.
Below we are going to talk about common zipper snags, some new terminology, quick fixes when you are on the go, and more thorough fixes for when you get home.
Common Zipper Problems
There are a few zipper issues that arise whether it’s on your trip or after you have gotten home. One of the most common zipper problems is also the easiest to fix, it is simply lots of debris in the teeth of the zipper, making it difficult to zip and unzip. Or maybe you have pulled the zipper up past the jam, but now the slider has completely popped off!
This common accident is called a broken zipper pull and happens due to the top stop of the zipper falling off, or being damaged. Finally, the third most common zipper problem to have is a split zipper. A split zipper is when you are pulling up the zipper and the bottom half will not stay sealed and yet the top will.
This is most likely due to damage around the bottom stop, which can be easily replaced. All of these problems are solvable with a few tools and a little patience.
101 Zipper Terminology
In this article, we are going to use a few words that may not be part of your everyday language, but are essential to talking about zipper repair. When you are buying a kit or trying to find replacement gear online it is important to know what you are looking for, and just as importantly what size zipper you should be after. Below we are going to explain a few terms and tools!
| Zipper Component | Use |
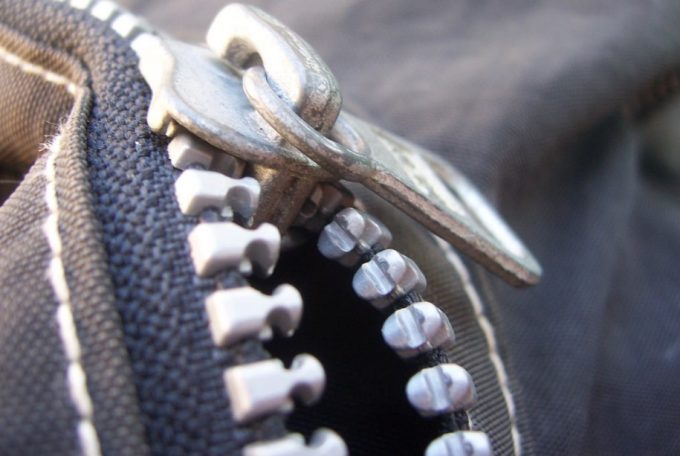
| Teeth | A zippers teeth are the two rows often made out of metal or plastic that allows the zipper to open and close. When engaged they are called a chain. |
| Slider | Simply put, the slider is what we often think of as the zipper itself, it’s the metal or plastic piece that slides over the teeth and clasps them together. |
| Top Stop | Top stops are the little metal bits that are found on the top end of the zipper that allows the slider to stop from running off its tracks.
|
| Bottom Stop | Like the top, the bottom stop allows both sides of the zipper to get locked in place and stops the slider. |
| Tape | The tape is the fabric on the side of the teeth and is generally what you sew into to attach the zipper. The tape is made exclusively for zippers. |
| Insert Pin | This pin is for separating the zipper by allowing the two zipper halves to join. |
| Box pin | The box pin, or the retainer box, is used to align to the pin and help the joining of the zippers. |
Now that you know the actual terms involved in fixing your beloved sleeping bags, you need to make sure that you have plenty of tools to get the job done. You can purchase a zipper repair kit, that will have lots of sliders, utility scissors, tweezers, and large needle nose pliers. Some fixes won’t require these tools to work, but it’s good to have them on hand. See more tips on how to repair zippers to give you more options.
When you Can’t Repair
Sometimes the extent of the damage on a sleeping bag’s zipper is too great to be able to fix, so before you start on your repair journey, take a quick look. If the individual teeth of the zipper or missing, you will need to either send it back or outsource to another vendor who can replace the teeth for you. Trying to force the zipper over missing teeth will just damage the bag more, and not create the seal you are looking for.

There are a few kits that you can purchase online that will have extra teeth in them that you can try and replace, but you should definitely do these kinds of repairs at home.
Coming Home: Fix that Zip
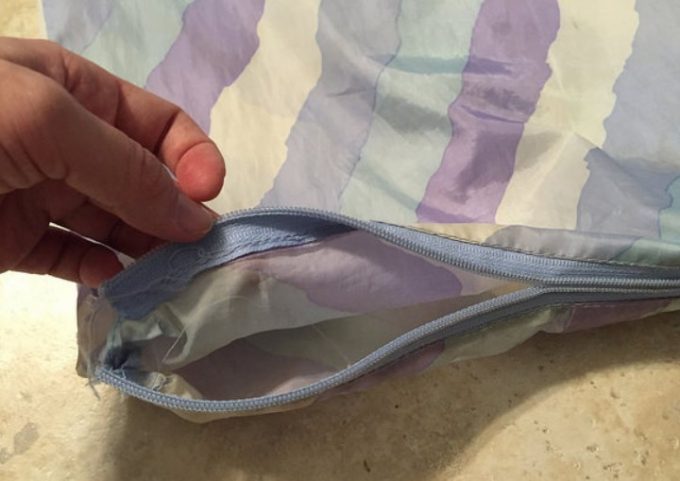
If you made it through the wilderness with your sleeping bag but the zipper is still busted, then we have a few fixes. First up is the split zipper situation where the bottom half is opened up and won’t seal but the top will, this is normally due to a damaged bottom stop.
Split Zipper
What you need:
- New zipper bottom stop
- Flathead screwdriver
- Pliers
- Seam ripper
Directions
- Lay out the sleeping bag so that you can easily access both sides of the zipper
- Move the slider all the way down to the bottom even if it’s just moving it on one row of the teeth.
- Once it’s at the bottom, you are going to angle the slider bit so that you can easily take the opposite teeth row into the bottom. If you are struggling with getting it back in, you can use a little flathead screwdriver to help ease it in.
- Now that the slider has both rows of teeth, pull it all the way to start of the zipper. You can wiggle it a little back and forth as you get it going, just make sure the teeth lock together. The sliders tab should be pushed down so that the chain will lock, keeping it from coming undone.
- Now to lock in the zippers bottom you will need to use your bottom stop. The bottom will have prongs; you will notice there is an empty spot on the bottom of the zipper (which is why the zipper bottom won’t stay closed)
- Place the prongs in that bottom spot and flip the sleeping bag around so that you can make sure the stop prongs are in correctly, at a 90-degree angle.
- Take your pliers and crimp the edges of the prong down, your zipper, now having a stop, should stay sealed!
Broken Zipper Pull
What you need:
- Top Stops
- Pliers
- Seam Ripper

Directions
- If the slider is still on the zipper, pull it up and remove it from the teeth.
- There will be a thread holding the zipper in place in your bag, take the seam ripper and remove this thread to make it easier to manipulate.
- Grab the pliers, and pull off the bottom stop of the zipper.
- Take the slider and slide one side of the zipper in, it should be upside down when you are looking at it, otherwise, your zipper will be inside out!
- Slide on the other side of the teeth into the slider. The slider should now be on the bottom.
- Using one hand, create tension at the bottom side of the zipper, and gently pull the slider all the way up to the top, don’t get hasty or you will just pull the zipper off again.
- When it is most of the way up, stop, and push the tab on the slider down to lock the zipper in place.
- Just like in the Split Zipper, you need to reinstall the bottom stop. Simply insert the prongs into the bottom, and crimp them into place.
- This time you also need to replace the top stop.
- Along the edge of the zipper tape there is the first tooth, place your stop there and crimp it into place.
- Repeat on the other side.
- If you have pulled out the threads you will either need to sew it back into place to secure the zipper or if you are on the go, taping or tacking it in will do just fine.
On the Go Fixes
One of the easiest fixes for a jammed zipper is a quick fix that only works if there is no damage to the top or bottom stop. Sometimes zippers will not work because there is too much debris in the way. This can easily be collected on a sleeping bags zipper, debris can be dust, dirt, pet dander, or even crumbs.
If there is no damage to the stops or the teeth, try giving the zipper a good clean. If you have a brush on you give the back and front of the zipper a good once over, or if there is lots of dirt, use a wet towel to work around the teeth’s edges before trying to zip again.
If you are worried about your sleeping bag, whether it’s brand new or well-loved, then you should consider buying an on the go zipper kit to make sure that you are fully covered. Most sleeping bags use a heavy duty zipper because they know that you are on the go in some rough terrain, but even then they will break. If the zipper is fully intact, and you don’t have any equipment but yourself and maybe some pliers, you can still fix it on the trail.
The issue is most likely the slider. Sliders, especially those that are well loved, will loosen up over time, typically from top to bottom, this is what causes the teeth to loosen up as well. You cannot create a sturdy chain and keep yourself zipped in and warm with a loose slider. Here is our go-to quick fix for this on the trail mishap:
Tightening Your Slider
- Unzip your zipper from the top all the way down to the bottom, make sure the slider is sitting evenly on the bottom stop of both sides of the teeth.
- Grab your pair of pliers (or anything else you can improvise with on the trail!) and clamp both sides of the zipper top to bottom, around one side of your zipper pull.
- Use a medium amount of pressure, so that you can feel the slider give, but not break, or press closed
- Repeat process on the other side of the zipper
- Zip up to see if it works, if it is still separating, then pull it down and tighten again.
*I clamped the zipper too hard! Don’t worry if you have managed to clamp down too hard on your zipper, it will make the slider a little stiff. Simply move the slider back and forth a few times and it will loosen up. You may need to tweak the slider a bit more once it is loosened, but a stiff zipper is fortunately not the end of the world!
Ready for a Good Nights Sleep
Having a jammed zipper is fortunately not the end of your most beloved sleeping bag, and can actually be fixed even in the outdoors. Before you go to an expensive tailor or to an outdoor store, try a few of these at home repairs. While zippers can be frustrating to break, they can be easy to fix. If you are looking to avoid zipper snags entirely look for sleeping bags that reinforce their zippers, use metal instead of plastic, and are careful with their seams!
That being said, even the best zipper on a sleeping bag will get a little worn down over time and need some repairs. Before you head out on your next outdoor adventure, check to make sure your zipper is clean, tighten, and snag free!
For more tips on how to fix a zipper, check out our earlier article on this topic.
Have you fixed your own zipper, or tried out one of our techniques? Let us know in the comments below!