How to Tie Knots: A Simple Skill That Can End Up Saving Your Life
Knowing how to tie knots is one of those things that is more or less getting lost to the ages. There are still a few areas in which you get to learn how to tie different types of knots however even they are thinning out little by little.
The truth of the matter is that, although the modern quality of life improvements and specially designed products do offer a good reason not to bother with this aspect, there will always be situations where you cannot rely on them.
Even to this day, a rope can make a huge difference especially in a survival situation, and knowing how to tie the proper knot for the proper use can make life a little easier.
That being said, having a knot tying guide at your disposal will offer you both the knowledge and the choice that you are looking for. From the most basic knots to some of the more advanced ones, all the way to ones that are used by special forces operatives, they are all at your disposal.
Types of knots
There are different types of knots and knot combinations out there that can serve different purposes. Each and every one of these types follows its own pattern, usually designed to cope with a certain aspect or demand that often arises in said areas.
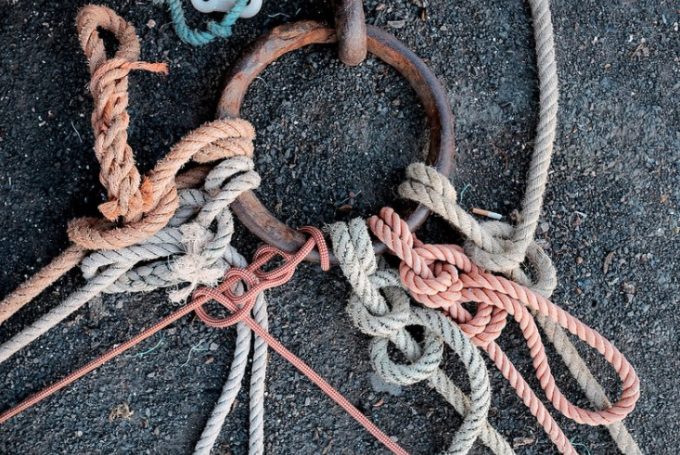
Some knots are designed to be easily untied with a simple move, others are designed to be as strong as possible, others are designed to handle friction and protect the rope underneath while others are designed to be moved around and adjusted on the rope.
See also: Best Knots for Hammock Camping: What To Do And Knot To Do
Here are just a few types of knots that you will have to be familiar with in order to safely and confidently venture out into the wild.
Basic knots
As the name implies, these are the simplest knots to tie. They do not rely on special techniques, doubling up or different hitch combinations in order to be effective.
These knots are frequently used with clothing, footwear and in simple comfortable situations like camping and equipment maintenance. They are not designed to handle heavy loads or stress and they are not to be used in those situations.
Survival knots
These are knots which, as implied by the name, are used heavily in survival situations. There are quite versatile knots which are designed to be able to handle heavy loads, handle a bit of stress and at the same time be easy to tie and adjust if need be without having to worry about whether or not they will hold.
Something to note about these knots is the fact that, because of their nature and design, they can be used not just with strings and ropes but also with vines and other plants if need be. Check out the many uses of the paracord to give you more options and choices.
Nautical knots
Nautical knots are mostly encountered on sail boats and military vessels. They are a collection of knots that are designed to hold under constant tension as well as to be easily adjustable without having to untie the entire knot in order to do so.
Usually comprised of multiple smaller knots or different combinations of knots and hitches, they have proven to be very versatile although hard to memorize and tie. To find out how to tie fishing knots, check out our earlier piece that explains the topic in details. It is recommended that the person who will end up tying the knots should have ample time to learn and practice how to correctly tie the knots before heading out.
Utility knots
Out of all the knots out there, these are by far the strangest and at the same time the most versatile ones. They do not follow a specific set of rules nor are they used for a specific task instead offering extra strength, support and overall power to the knots that they are associated with.
Some of these knots are direct derivations of more popular knots which have been modified in order to meet a specific need that the original could not.
These types of knots are more frequently used by mountain climbers, military, and paramilitary troops while in the field and have proven their worth on countless occasions.
Special knots
These knots often times go unused and end up forgotten, however they serve some very important all be it restricted purposes. While overall not as useful as the other types of knots on this list, they are still able to handle their own respective purposes, especially in survival situations where supplies are scarce and leaving something behind is not a real option.
A word of caution, though, special knots also include some of the most dangerous and often times life threatening knots. These can lead to severe injuries and even death if misused or as a result of even the slightest mistake. A lot of practice time is recommended before trying to use these knots.
The do’s and don’ts of knot tying
There are a few things that you will need to keep in mind when tying knots, which will prove more than useful in a lot of situations. These are not just etiquette guidelines, but also principles that will help you with a lot of aspects related to your experience in the great outdoors.
Do: Take your time
The very last thing that you want to do is rush and ruin both the knot and the rope. While it is true that some knots are a lot harder to tie than others, it does not mean that they have to take the same time to tie. Take your time, look at what you are doing and take the necessary steps in order to properly tie the knot, regardless of long it takes or how it might look.
Do: Straighten the kinks and twists
Often times, the rope that we use will get twisted around, bent at odd angles and warped in some manner. These things are largely unavoidable, the reasons behind them ranging from the way in which they were packed to temperature changes and the amount of moisture around them.
Although preventing them might not be all that possible, fixing them is, so grab a stick and use it more or less as a rolling pin or grab your pocket knife and use the side of the thick plastic case to apply pressure on the rope and straighten it out.
Do: Keep the rope clean
Letting the rope get dirty and grimy can cause it to stiffen up and be a lot more difficult to tie, or downright impossible to untie. Make sure that the ropes are nice and dry and use a piece of cloth to wipe them down if they happen to have some dirt and grime on them.
Another thing to watch out for here is stiffness in the ropes. The salty air tends to do this to them, so if you happen to be on a sailboat or camping along the coastline, make sure to check the ropes regularly and give them a good flexing every now and again.
Do: Double check the anchor points and support points that you will be using
It goes without saying that these points are very important because they are what you are tying the rope around or the knot onto in the first place.

Anything and everything can be an anchor or a support point, as long as you can slide the rope around it, however not all things are sturdy enough to support the weight that will be put on that rope.
So before tying the rope, put some weight and some pressure on the anchor points to see if they give way. Make sure that they are as safe as possible and fully capable of supporting your body weight before tying the rope.
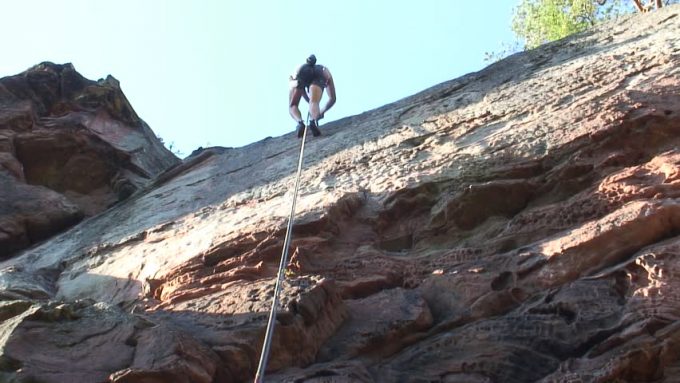
Do: Mark your path
This is especially true if you are scaling a rock face or climbing a mountain and it involves leaving behind visual clues and hints that the anchor points that you have used are able to support the weight of an average adult.

This will help you during your stay in the wild or on your way back, it will help other hikers that will come through that area and it will help search and rescue teams locate you faster if in a survival situation. Use sticks, colored pieces of cloth, anything that can stand out and you can spare at that time will do.
Don’t: Cut the rope
More often than not, a rope is one of the most important pieces of gear in your arsenal. Whether on a leisurely outing or in a survival situation, the rope that you have on you will prove its usefulness on more than one occasion.
Cutting it into smaller pieces will do nothing more than reduce its usefulness and render it more of a hindrance. Even if a knot is too tight, you can jam it apart without actually cutting it.
Don’t: Tie the knot too tight
Knots are not supposed to be too tightly tied in the first place. They are supposed to be solid and sturdy, however, they should rely on the weight and pressure that is applied to the rope in order to stay tied.
If you go overboard on tightness, the weight and pressure that you will put on the rope will actually make it even tighter and a real nightmare to untie.
Don’t: Use too many anchor points
There is a general rule when it comes to knots, and that is “one knot per anchor point”.Although it might seem like a good idea to secure it in more than one anchor point before tying, the resulting knot will actually be a lot weaker and a lot more unstable than it should.
Just stick to a single anchor point per knot and you will be fine. You can double the rope through the second anchor point and tie a second knot on it if you want to feel safer.
Don’t: Leave the rope behind
There are certain situations in which you will find yourself contemplating whether or not to leave the rope behind.
Although sometimes it might seem as if you don’t have much choice, like after using it to climb down a cliff, however, there are ways in which you can recover the rope and it is a good idea to have it on you.
Don’t: Tap the knot
This is something that most of us end up doing without noticing it, mostly because it gives us the subconscious feeling of safety and security. However tapping the knot is not really a good idea, especially with more complex knots that rely on pressure and weight to be put on them in order to stay tied.
Without realizing it, depending on how hard you tap it and with what, you can end up loosening it which can have disastrous consequences.
Practice
By far the most underestimated part of the learning process, practice is actually essential to learning any skill. This is blatantly obvious when learning how to tie knots because although a general idea and instructions are great to have, they often prove insufficient without the practice to back them up.
Even though time might seem to be an issue here, you should still find a way to set some of it aside to practice your knots. When you are out there in the wild, there are some situations where you can take your time, but a lot of situations when you simply can’t.
Not to mention that one wrong move, one weak hitch, one wrong loop and the entire knot can come undone when it is needed the most, although it might look solid and stable.So how do we go about practicing tying knots then?
Simple – start off with a shoelace or a thin cord and tie your basic knots without a support point. This will help you get more acquainted with the knots and build a bit of muscle memory.
Then grab yourself a support point. This can be the leg of a chair, a table, virtually anything that you can wrap the shoelace or cord around but at the same time is sturdy and heavy enough to not move when you start pulling. Use the support point to practice the basic knots as well as more advanced ones.
Alternating between different support points and even reverting back to tying them without any support point is a great idea, helping you build upon the muscle memory and explore different situations and scenarios.
After you feel that you are comfortable with tying knots on the shoelace and thin cords, you will have to move up to thicker alternatives. Keep upping the thickness of the rope until you are literally practicing on the ropes that you will be using.
Although it might seem a bit tedious, it is actually recommended to move up through the different thicknesses to get as much experience as you can and learn how to compensate for the increase in difficulty when it comes to tying a knot with thicker ropes.
Often times when practicing, you will find yourself in the awkward position of not being able to untie the knot that you have just tied. This is because it was too taut and there was too much pressure applied to the rope when tied. Do not, under any circumstance, cut the knot or rope.
If you want to untie the knot without much hassle, grab a small pocket knife and wedge the blade in the knot, loosening it bit by bit. Make sure not to damage or accidentally cut it while doing so.
Basic and survival knots
Reef Knot
This knot is often used to tie two cords of equal thickness together. It is easy to tie and undo, except when under pressure, but is not suitable for smooth ropes or cords such as nylon.
Being an easy knot that is quick to make and convenient, it’s popular among sailors, climbers, and casual campers. This knot is usually adequate for most casual applications, but not suitable for heavy loads or in situations where knot integrity is important.
How to tie the knot:
Use either 2 cords or 1 long cord
- Take the ends of 2 cords and lay the right-hand cord over the other
- Place the right-hand cord under the left-hand cord in the same way you would for tying your shoe laces
- Bring the right-hand cord back over the left-hand cord
- Bring the right-hand cord over the other rope
- Push the right-hand cord under the other rope
- Pull firmly with equal force on all four lengths of cord to tighten the knot.
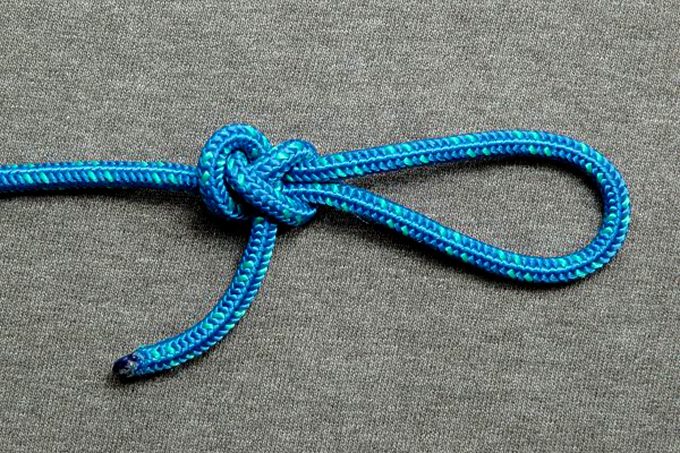
Lark’s head knot
The lark’s head knot is very simple and quick to apply. It can be used for attaching just about anything to anything else such as a ring, rod, or even a ribbon. This knot is unique as it can be used with complete loops, like rubber bands or hoops of cordage.

How to tie the knot:
- Fold your cord in half, or if using a loop, find the spot on the loop that you’d like to be joined up.
- Lay the folded cord on the object you’re attaching it to.
- Loop the rest of the line around the object and through the bend and pull tight.
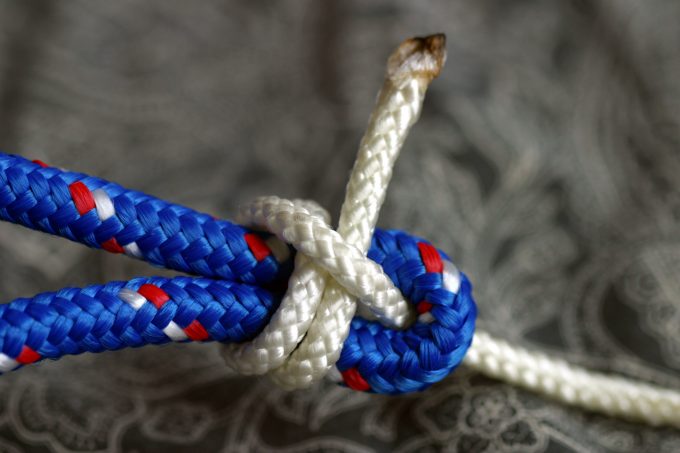
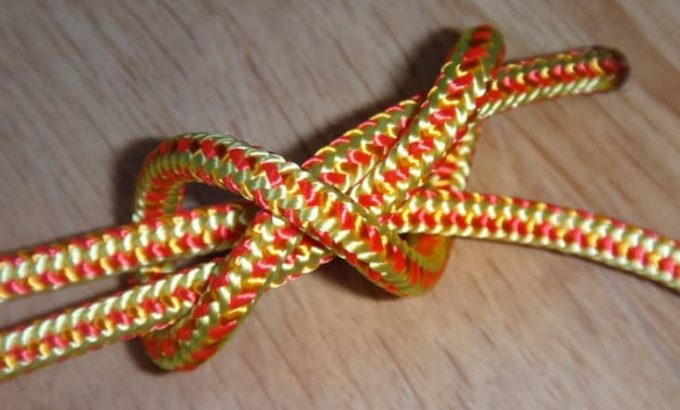
Weaver’s Knot
The Weaver’s Knot is a stronger knot than a square knot and often used for joining different size lines. As the name implies, it is used to join broken threads in the textile industry, this knot is also used to make fishing nets and hammocks.

How to tie the knot:
- Bend the end section of the rope into a U-shape
- Take the second cord and slide it up through the U-shape
- Pass the working end beneath the U-shape
- Tuck the working end beneath itself in such a way that both short ends are located on the same side of the completed knot.
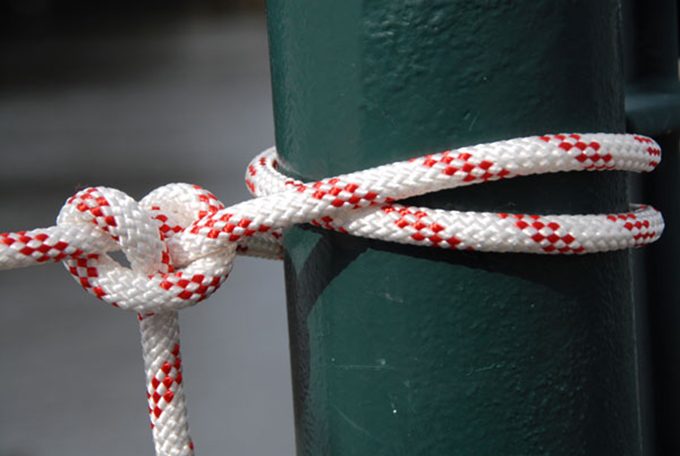
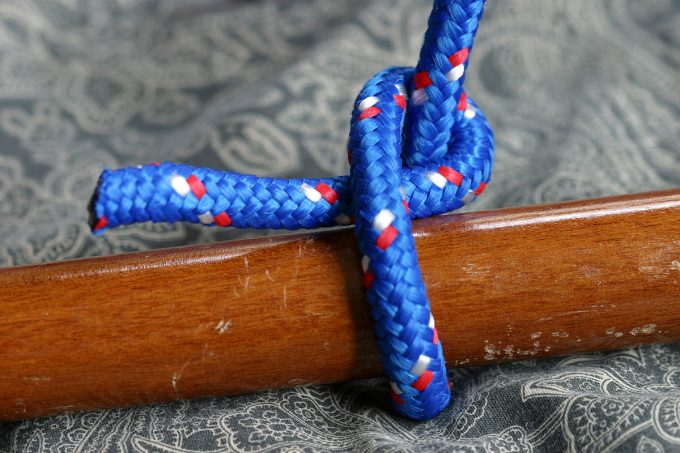
Half Hitch Knot
The Half Hitch Knot is a fairly easy overhand knot. The movable end of the rope is wrapped over and then under a fixed part and tightly pulled.
Although a complete knot on its own, it is seldom used because it is very insecure, two half hitches together can be used to tie a rope to a tree, boat or any object. In most stances, it is used in combination with other knots often for tying any loose end for additional protection and safety.
Because this knot is attractive it is often used decoratively for designs and half hitch whipping.
How to tie the knot:
- Pass the end of a cord around the object you wish to tie, bringing it back to you and forming a loop
- Pass the end of the cord through the loop between the object and yourself forming a knot
- To make this more secure pass the cord through again in the same direction to make what is called 2half hitches or a double half hitch.
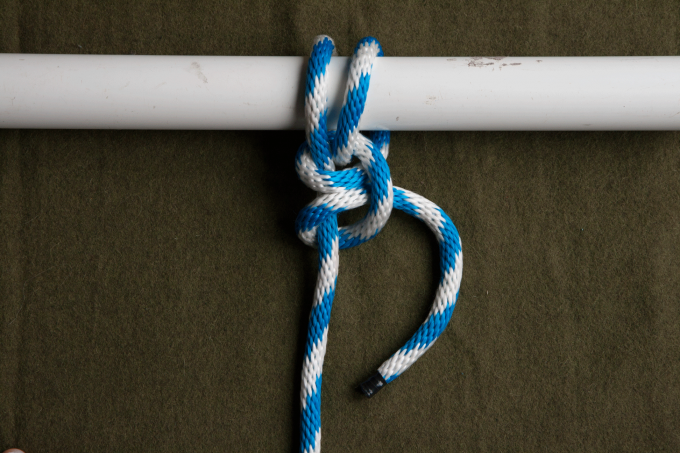
Blake’s Hitch
The Blake’s Hitch is a friction type knot popular with tree climbers for ascending and descending on ropes. This hitch is convenient because it can be tied using the end of a rope or cord.

How to tie the knot:
- Wrap the cord four times around other cord, working it from the bottom to the top.
- Leave enough room in the 2nd wrap to accommodate the tag end of the rope.
- Run the tag end down to and over the standing line, behind the main static cord and out through the 2nd wrap.
- Tighten the knot and finish it with a “Figure Eight Knot” for a stopper at the end of the line.
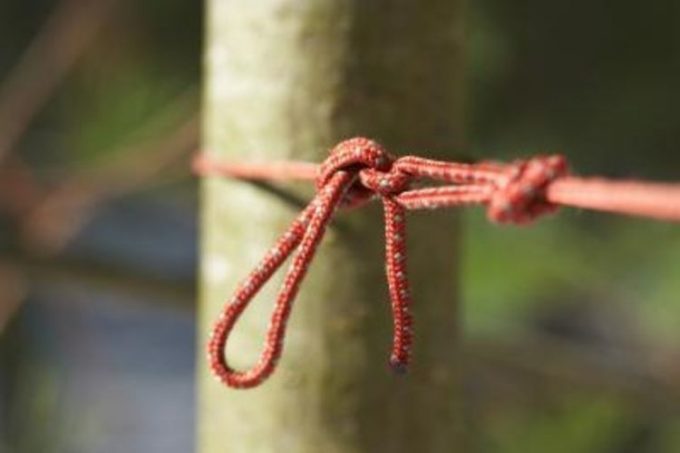
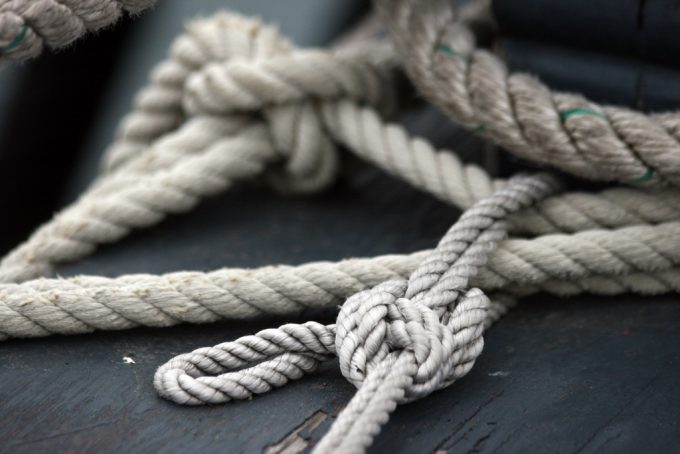
Timber hitch
The timber hitch was developed to pull logs and is often used for handling cargo. This hitch performs well under load and almost falls apart when the load slackens. Often when towing a log or pole the hitch is attached in the middle of the log and a half hitch is placed at the end to act as a guide.
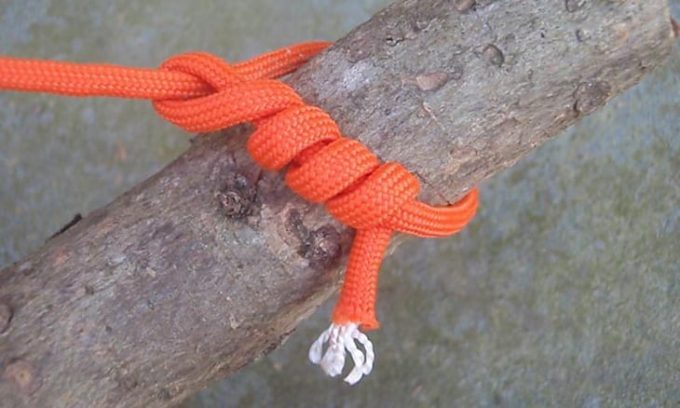
This Hitch is the same as the Bowyers knot as it is used by bowmen to attach the end of the bowstring onto a longbow. Guitar and ukuleles also use this hitch for the string attachment.
How to tie the knot:
- Pass the working end of your cord around the object you want to haul
- Turn the cord around itself, the standing part.
- Tuck the working end back around itself three times inside the loop
- Make several half hitches near the forward end for use when hoisting and to stop the log from twisting.
This is used to cinch or tie down a load. Using this combination of knots allows a line to be pulled very tight, securing the load.
Trucker’s Hitch
The Trucker’s Hitch is probably the most useful hitch there is, it allows loads of many types including heavy loads and loads of uneven shapes to be easily secured in place.
![]()
Once you have attached the line and used the trucker’s hitch to pull the line to the tightness you desire, using a pulley-like effect on the loop in the center of the line, the knot can be secured in place by using a few half hitch knots around both lines or only one end, depending on preference.
How to tie the knot:
- First one end of your cord has to be secured to a good anchor point
- About halfway down the cord, tie a loose half-hitch knot to build a loop in the middle of the rope, ensuring the loop is formed using the loose part of the rope or it may tighten under pressure.
- Feed the cord around another secure tie point, ensuring it can slip through as it tightens and feed the free end through the loop
- Using the loop you made in the line as a pulley, pull downward with the free end, making it as tightly knotted as you can and then secure the knot by using two half hitches around both ends of the lines.
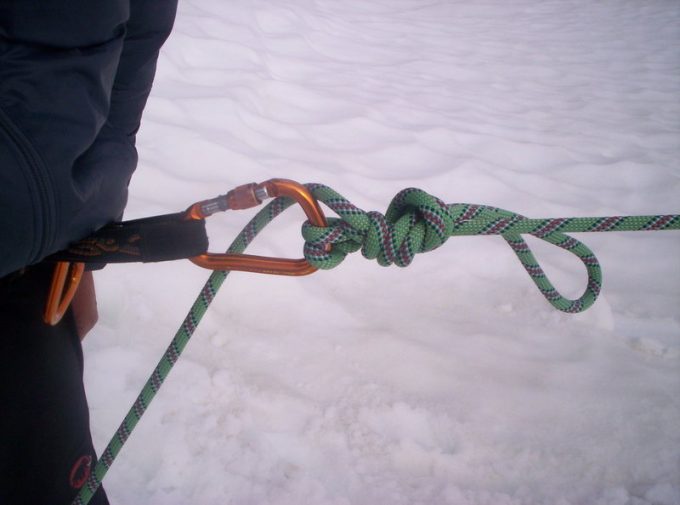
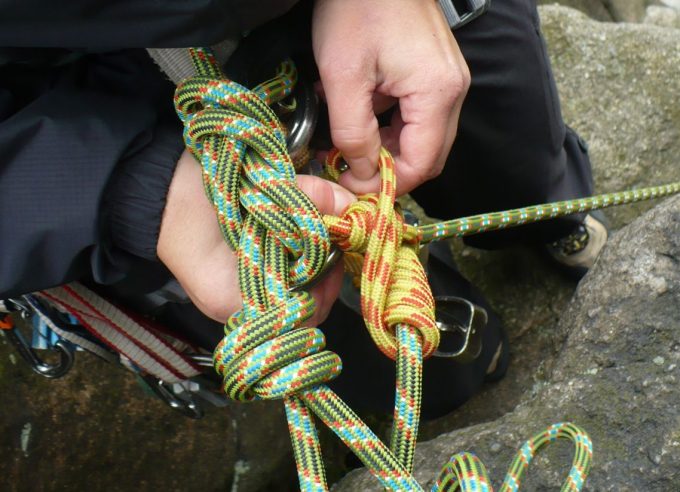
Prusik Knot
The Prusik Knot is used as a friction hitch knot who’s purpose is to apply a loop of cord to a rope so that it can be used in climbing. It’s mainly used in outdoor climbing activities.
How to tie the knot:
- Use a cord and make a loop underneath the rope that you want to add the Prusik Knot to.
- Loop the cord over itself and take over the top of the rope. Pull through the loop. Make sure that the remainder of the cord follows inside of the loop.
- Repeat the previous step between 3 to 5 times, depending on the thickness of your cord.
- Bring the cord into the loop once more, but tighten it this time, instead of pulling it completely through.
- Pull the cord in various directions to add tension to the rope
- When you apply a downwards tension it allows the Knot to become and stay tight.
- When there is no tension the knot will be able to slide loosely up and down the rope
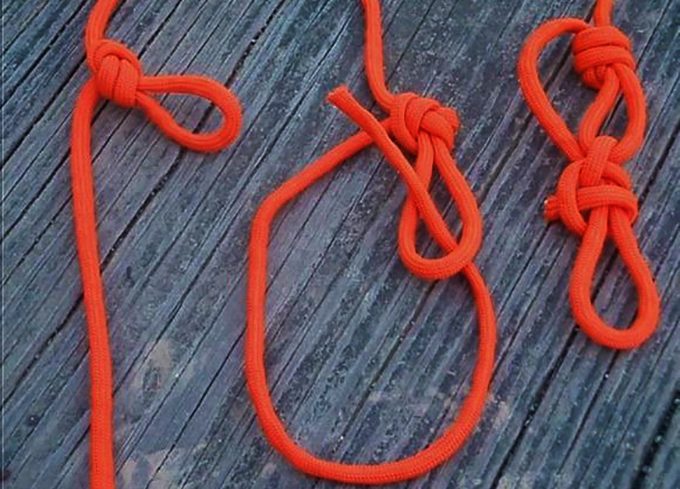
Bowline knot
The Bowline is often referred to as “The Rescue knot”. This knot creates a loop at the end of your cordage, a loop that cannot shrink or expand. In “The Boy Scouts”, this knot is often taught using the story of the rabbit coming out of its hole, in front of the tree, then going behind the tree, and back down his original hole.

How to tie the knot:
- Form a loop on top of the long end of the line leaving enough cord for your desired loop size.
- Just like when you are making an overhand knot, pull the free end of the rope through your loop. Continue around behind the line and then back through the small loop.
- While maintaining the secondary loop that is going to become your Bowline loop, bring down the free end of the original loop.
Figure-Eight Knot
The Figure-Eight Knot is a more secure knot than the most knots. It can be used for preventing cords and ropes from fraying and as a stopper. Rock climbers use it often for tying carabiners onto ropes and it is a favorite for securing overhead weights.
How to tie the knot:
- Tie a single eight in your cord, two feet from its end.
- Pass the free end through any secure tie-in point if desire
- Retrace the original eight with the free end, leaving a loop at the bottom of the size you require.
- Pull all four strands of cord to cinch down the knot.
Nautical and support knots
Lineman’s Loop
The Lineman’s Loop is a knot used to form a loop in the middle of a rope or cord when you do not have access to the ends.
This knot will handle significant amounts of weight on the loop and the ends and it is also good with loading from all directions. The shape of this loop makes it easy to inspect and maintain the knot if need be.
How to tie the knot:
- First, make a large loop in the part of the rope where you want to have the finished loop
- Twist the large loop to form 2 loops, a large loop on top with a smaller one under it.
- Fold the top loop over the bottom loop so that smaller bottom loop is inside the larger loop
- Take the farthest edge of the bottom loop from the first loop and bring that through the second (smaller) loop
- Tighten the knot, allowing the ends to tighten themselves while you tighten the whole knot.
Anchor Hitch
The Anchor Hitch, as the name implies, is an excellent knot for attaching an anchor line to a chain or anchor eye.
How to tie the knot:
- First, pass the cord through the anchor ring from behind it.
- Then pass it through the anchor ring once more in the same direction.
- Continue feeding the cord under the standing part and through the 2 loops.
- Then pass it under the standing part then over it and through the loop, making a half hitch.
- Make a second half hitch and then seize the tail end of the line (Tie it off with twine).
Chain Splice
The Chain Splice is a knot that is great for splicing a rope or cord to a chain which is usually done when a chain and cord combination has to pass over a windlass or winch and then go down into a chain locker.
How to tie the knot:
- Undo the braid on the cord or rope and divide these strands into 3 equal sized strands, it is usual to undo a measure 21 times the cord’s diameter and then wrap the rope at this point with tape or twine to stop it unraveling further.
- Push 2 strands together through the end of the chain up to the point where you tied the main cord off
- Then pass the 3rd strand through in the opposite direction
- Lay the 3 strands down beside the cord and thread them into the cord using a spike to open the weave, starting as close to the chain as possible
- Complete the splice by tucking the rest of the strands into the cord in line with the existing weave or pattern. Once the first 3 tucks are made, it is necessary to remove the twine so that the splice can be pulled tight up against the chain or anchor eye.
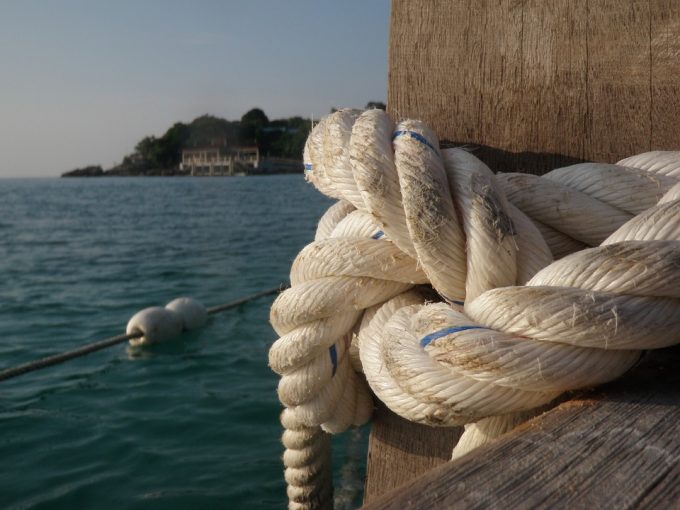
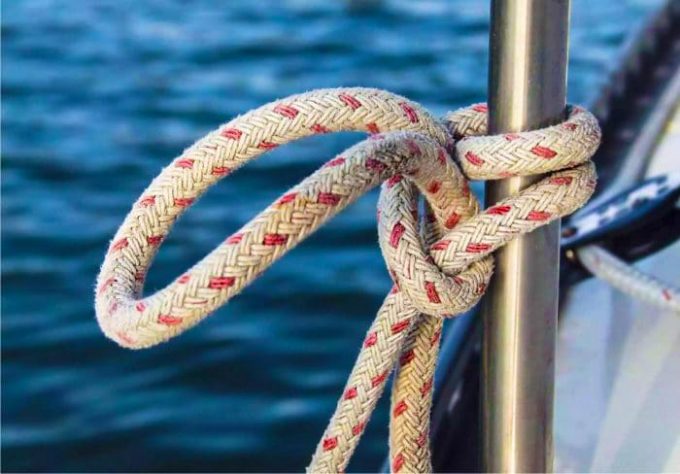
Cleat Knot
The Cleat Knot is deceptively simple, yet it is often made the wrong way by the inexperienced, if it is not done correctly it can be impossible to undo when under pressure or when supporting a load.
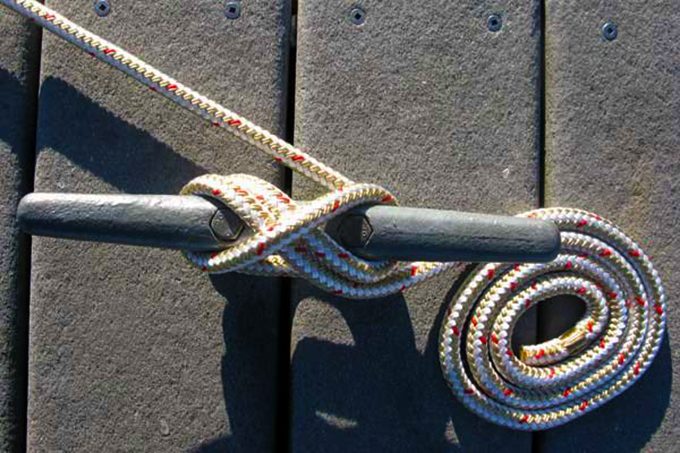
How to tie the knot:
- At the start, the cord or rope must feed around the most distant horn of the cleat followed by a turn in the same direction around the other horn.
- After passing the cord around the 2 horns of the cleat, the cord must crossover to form the figure 8 turns. The number of turns is dependent on the size of the cleat and the size of the cord or rope. It is recommended that a cleat hitch should never be finished with a half hitch, but it is acceptable to make a half hitch in the line a little way up from the cleat to keep it from cluttering the deck, as long as it can be reached easily and quickly.
- The modern synthetic ropes that most people use are stronger, thinner, more slippery and more elastic than traditional ropes (a nylon rope will stretch more than 5% when loaded to 20% of its rated breaking load) so this should be taken into account.
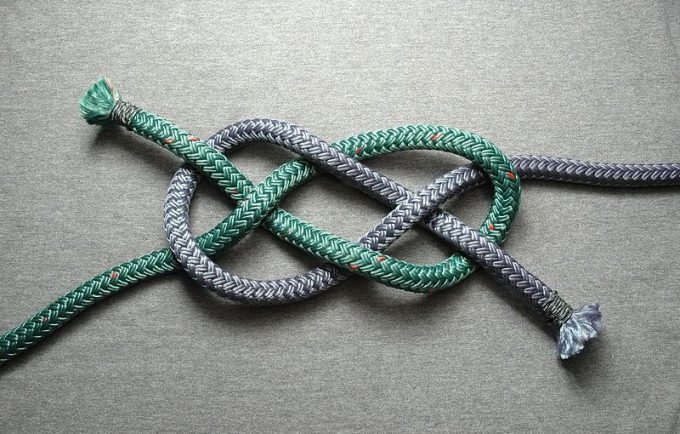
Zeppelin Knot
The Zeppelin Knot is one of the strongest, most secure knots commonly used, although it may look complicated, if you go slowly and follow instructions, it’s can be quite simple to tie.
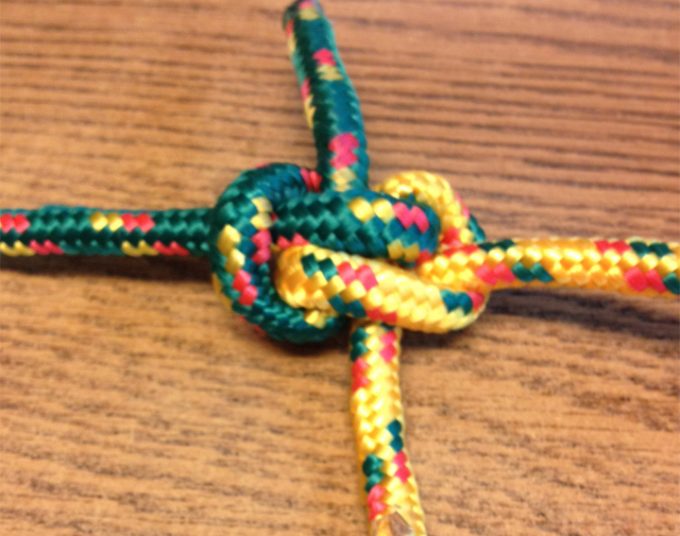
Basically to make this knot you make two loops and join them together, forming one single knot.
How to tie this knot:
- First, check your cord for any tangles or knots. Make sure that the rope is free of any obstruction
- Place two pieces of cord on a flat surface, forming a straight line with a small break in between the line.
- With the left-hand cord forms a counterclockwise loop, it is important to place the tail of the left loop over the rest of the rope, forming a q-like shape. Do not place it under the rest of the rope.
- With the right-hand cord form a clockwise loop, this is basically the opposite of what you did with the left-hand cord. Pass the end of the right cord under the remaining cord. For the knot to tie or work correctly the loops must be perfect mirror images of each other, with one tail hanging over the remaining rope, while the other rope should have the tail passing under.
- Place the left loop on top of the right loop so that the loop with the tail is on top of the excess cord that goes on top of the loop with the tail end on the bottom of the remaining rope.
- If necessary get assistance to keep the cords in place while you work.
- Take the tail of the left loop and pass it through the two stacked loops of rope, ensuring that the tail end of the left loop passes under the circle formed by the two ropes. Do not pass the tail end of the left rope over the circle.
- Then do the same with the right loop’s tail, take the tail of the right loop through the two loops of cord, the circle, passing the tail end on top the stacked loops.
- To finish the knot, pull on the long ends until the knot is tight and secure, not the tail ends of the two ropes. Pulling on the tail ends will undo the knot so you will have to start again.
Special knots
Hangman’s Noose
The Hangman’s Noose is that knot that has been used for years by fishermen and boaters. It has also been used in hangings and lynchings (hence the term hangman’s noose).
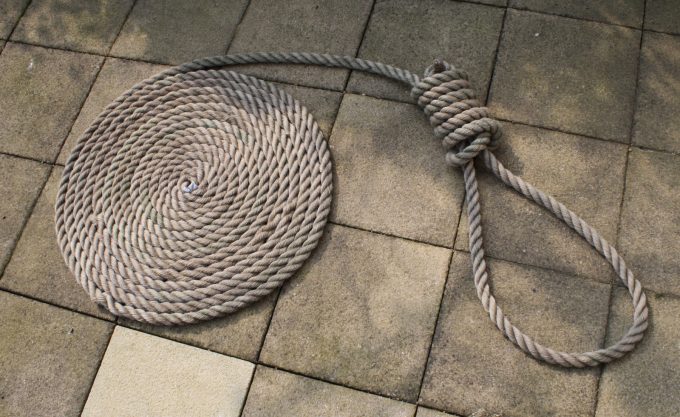
In many places, it is considered a threatening gesture to have one displayed and is often illegal, but it is not a difficult knot to make.
How to tie the knot:
- Use a piece of cord or rope that is at least 3 ft long
- Place the cord on a flat surface and form an “S” shape with the bottom or lead part of the cord left long, this is so you have something to tie it to when it’s finished.
- Compress the “S” shape of the cord until all three rows of it are nearly on top of each other, with only a few inches in between them.
- Bunch the three lines of the cord tightly together in the middle until the ends look like a bow-tie.
- Using the cord that made up the top, wrap it around, from the right side to the left, leaving about three to four inches of the cord unwrapped.
- You should be left with a loop and a string on the left end, and just a loop on the right end of the “bow tie.”
- Poke the end of the cord through the top of the loop.
- With your thumb to hold down the short piece of cord that you worked through the loop on the left-hand side so it bends over the loop.
- Pull the right-hand side loop of the bow until it closes the loop on the left. Adjust the noose until it’s the size you want and the coils look nice and tight.
You can also use various knot combinations in order to obtain different results, a good example of this would be using 2 figure-eight knots side by side in order to make rope handcuffs and so on.
In conclusion
While the list of known knots is virtually endless, they all have a few things in common. While some are a lot more popular than others while some remain in obscurity, it is only a matter of time until you find yourself in a situation where you have to tie a knot, and the simple shoelace knot simply does not suffice.
As long as you read up on the knots that you want to learn, take the appropriate time to practice and improve them, and remain calm and collected while tying your knots, you will learn more and more knots. This will make you a lot more dexterous and a lot more confident with a rope which will end up saving your life in the future.
Before you embark on another adventure, see our piece on how to choose the correct type of ropes for the outdoors. Definitely a must-read!