How to Sharpen An Axe: Improvise for A Sharp Edge
When you venture into the wilderness, an unknown realm which is most probably unsafe, inhabited by wild creatures and at mother nature’s mercy, you better come prepared.
Equip yourself with everything you might need to be safe, warm and protect you from rain or any other sudden weather changes. Check every piece of equipment twice. Of course, this is the soundest advice one could get before any other tip or instruction.
But if so, then where’s the fun in all of it? This would be the question on the lips of all adventurers, those who throw themselves into this truly wild experience with full awareness but minimum gear.
[the_ad_group id=”21″]
And if it so happens that your hatchet is blunt? – the overly cautious one counters.
Then I’d hone my chopper with a rock – an echo that seems either brag or pure madness.
However unbelievable, this article will teach you how to sharpen an axe in the wilderness by using alternative methods.
It is not something to rely on if you haven’t tried it before, as sharpening is a craft. And when you lack the proper tools to perform it, it becomes quite a challenge that can transform in a risky undertaking and might end up with a totally ruined blade instead of a razor-sharp one.
That’s why it’s always better to train your skills on the old used hatchet before moving on to your newest tip-top model.
See also: Best Camping Hatchet: Our Top 8 Choices Reviewed
Furthermore sharpening an over-used hatchet with a worn out blade is not something that can be done with a rock or anything similar unless you plan to dedicate at least an entire day to this task.
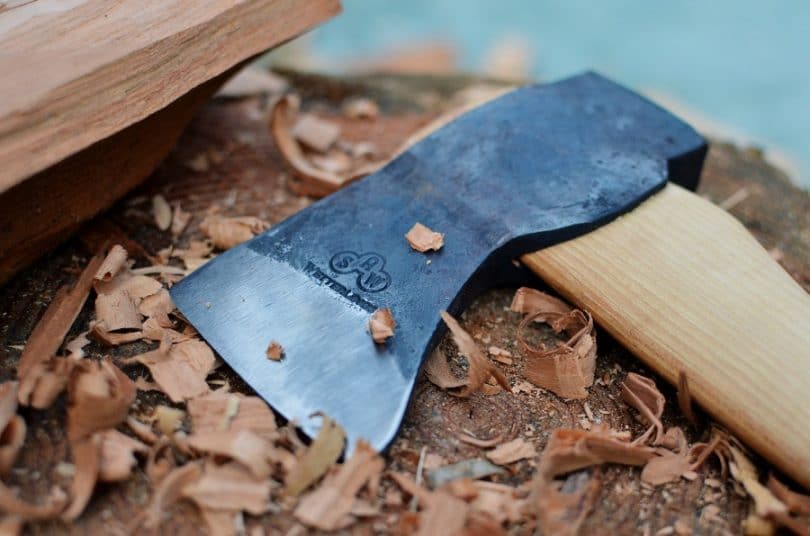
A blade should be refreshed periodically, otherwise, you will be forced to shave off a considerable amount of metal in order to obtain a good sharp edge and its original angle.
Actually the user instructions as well as the recommendation of anyone who works with his axe daily, state that you should give the blade a short quick sharp or at least strop it a few times before any use, most of all if you grab it rarely.
Sharpening is a laborious activity that implies patience and attention as you need to have precise and still slow, constant moves. Moreover, you have to repeatedly examine the blade, if it’s straight and symmetrical on both sides.
As well as temper yourself, because like any monotonous meditative task, this may carry you away and forget to turn your axe on its other side only to keep working till its overall shape becomes completely unbalanced.
A Quick Macro Glance
In the process of sharpening fragments of metal are being carved off the blade. Some of them fall off immediately or at the first rinse, others are thinly shaved until they burr at the edge.
By understanding what exactly happens, you can better appreciate the pressure you apply when honing as well as be more aware of the necessity of a constant precise flow of movement.
How to Sharpen An Axe
When performed in a professional workshop, the sharpening is done using a grinding wheel or some sort of a power grinder that ensures an even and extra sharp blade, features that you can’t accomplish with rudimental tools unless you are extremely proficient in this.
Nevertheless, you can still manage to get your blade a well-refreshed sharpness.
- Unlike when sharpening a knife, working on an axe blade is done in the opposite direction, moving into the edge and all the way to its middle, grinding into the metal.
- Especially when using a power grinder, you have to be careful not to overheat the metal because this may reduce its overall resistance. But even when using a rock and your own hand as a power tool, if you concentrate too much on a single small area, press too hard or stroke too fast, you can create enough heat to entirely damage the metal. This can make it chip faster and deeper.
- Constantly pouring water is essential to prevent the above as well as to clear away the minuscule fragments of metal resulted in the process. If left on the blade, rubbing the rock on them instead of the plain metal surface would bend or even nick the edge. Cooking oil will also do a good job if you’re prepared for a camping cooking experience. But this is one of the reasons that the best place to do this in the wilderness is at a river – not only you can find your perfect stone but you can constantly rinse away the metal residue in flowing water.
- When using a rock or another object with a similar surface you have to stroke the blade with round moves, starting from the edge into the metal applying constant pressure and covering evenly the entire surface.
What you have to do is start grinding slowly and smoothly one side and after a while turn it over – you will see a line of burr on the other side of the blade. Grind this one as well, this action will diminish the burr and move it to the initial side. You will repeat this until the burr is almost invisible; some very small part will remain but it will solely fall off when you’ll first use your axe.
Coordinates You Should Pay Attention to
This type of task is one that needs recurrent breaks to check your progress, spot the areas where you need to work some more but most importantly, assure yourself that you’re not overworking.
It is essential because the axe blade is specifically designed for an optimum crack into the wood, ruining it will considerably decrease the efficiency of the axe or even make it completely useless.
So here’s what you should be careful with:
- The edge line – should be straight
- The angle of the axe – there are various types of blades designed to perform specific tasks, some are used only for carving, others to cut big chunks of hard wood or hatchets that are devised to chop small thin branches.
One of the main differences is the angle at which the blade is carved into the metal and the particular shape – convex, fully flat, hollow. Most probably the one you will have with you on your wilderness exploration will be the hatchet which has a convex blade.
When honing one would wish to preserve the original inclination and in the case of hatchets, their convex blades are one of the hardest to sharpen because you have to follow and maintain the curvature.
When surrounded by professional instruments, a type of measurement gauge is usually used for guiding. When in the wilderness though, you can either improvise a sort of mold or frequently check and assess if you’ve maintained the original shape.
One thing you have to look after is that the angle fuses fluidly into the bevel, no delimiting edge between the parts – this you can also feel with your hand.
[the_ad_group id=”22″]
To check your edge if it’s straight or if you grinded symmetrically both sides, position the blade in direct light and if it’s razor-sharp the edge will not reflect any light, but it is also enough when you can barely see a thin line of light.
Following the edge line, you can observe if it’s thicker in some areas or if it has accidentally chipped. In the same way, by observing the reflected light and thus the brighter areas on the axe head you will be able to examine if you’ve grinded evenly and identically both sides.
Alternative Methods and Materials to Sharpen An Axe
Virtually anything that blunts your blade can also be used to sharpen it, but as you’ve realized by now, you have to choose your instrument carefully.
If you know what to look for you can get extremely creative – in the cities people have been known to successfully use cement stairs, red bricks, bottom side of flower pots.
Most accessible possibilities when hiking, climbing, camping:
The rock not only has been used to sharpen man’s first axes, but primitive analogous tools were made out of stone. For grinding it, one had to stroke the rock against a stronger one.
This is the most reliable material that nature has to offer but you can’t just pick any stone and expect it to be suitable for this task. If you start to analyse the types of stones that you pass by on your walks, you will become aware of a whole variety of features.
You will notice that the stones that you find when cruising the plains are crumbling more easily but among them, you can also find limestone that can be good for grinding.
The advance in altitude will correspond with an increase in the resistance of the rocks. The mountains have been mined for thousands of years for some of the hardest sediments – flint or the highly spectacular Novaculite that is actually used on a large scale now for producing tools for sharpening metal as well as for cutting.
It’s an extremely small chance that you can step into such types of rocks but it’s most probable that you can get a less tough but still a satisfactory version.
The river stones are the best option because they have been naturally smoothed by the perpetual water flow, that has removed layer after layer of the lowest density surface area, revealing the solid essence of the stone. You can also be sure that it has the same density all over its surface, the river took care of this as well.
Some stones break into smooth, compact, thin layers, that can also come useful as a sharpening instrument.
The essential characteristics that your rock should present are a uniform surface, grain and density. Any differences, however small, will consequently be observed in the shape and sharpness of your blade.
The axe should be positioned and firmly fixed. You will sharpen each side consecutively, grinding in circular strokes, always considering to start from the edge towards the base.
Periodically rinsing with water or oil. Follow the ping-pong transition of the burr from one side to another till it gradually disappears.
The leather belt is ideal to strop and give the blade an extra finish. Evidently, this kind of material can’t perform a valid honing but it can provide an excellent polish. It can also take off the left over burr and confer a uniform and sharp edge. And for this, leather alike has been used traditionally by many past generations.
The axe has to be stropped against the leather surface, only this time you will do it in the opposite direction than sharpening, towards the blade, otherwise you wouldn’t be able to smooth out the edge and you’d probably cut off your belt.
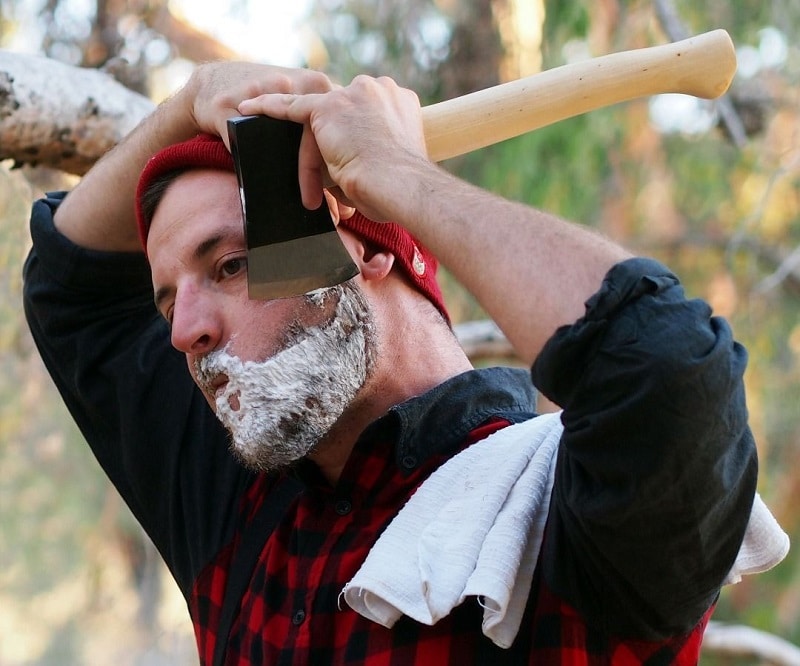
For an easy handling, you can secure one end of your belt from a tree and keep the other one in your hand. Somewhere between thirty to fifty strops on each side will be enough for your morning shave, considering that if you take measurements for a beautifying ritual in the wilderness you do take the same responsibility for maintaining the performance of all your gear.
Coffee mug. this will only apply to those coffee fanatics that bring their ceramic home cup with them. But as I’m sure there are a lot of them among you, you can now rejoice as you’ve just found another function for this inappropriate kitchen article.
For this, turn it upside down and use the interior circle that is not enameled and stands out a little bit. Same principle as for the rock applies to the mug. It’s a bit difficult to handle, but hey, if you have it with you, it can be more productive in the end than any rock that you would have to go hunting for.
Cautions
You are working with a very sharp blade and stroking against its edge which means that your fingers holding the rock are exposed. Your full awareness has to be urged into action as a moment of negligence can cost a finger tip and you only have ten.
To avoid such incidents, make sure you place your fingers as far as possible from the side of the rock that will be sliding against the metal.
For this you should also consider choosing a stone that can be grabbed adequately – so grab, feel it, judge it.
When working in your well-equipped garage or workshop you sure can find a pair of gloves to use. While outdoors, you have to make up an alternative or use the old fashioned mental tool of attention.
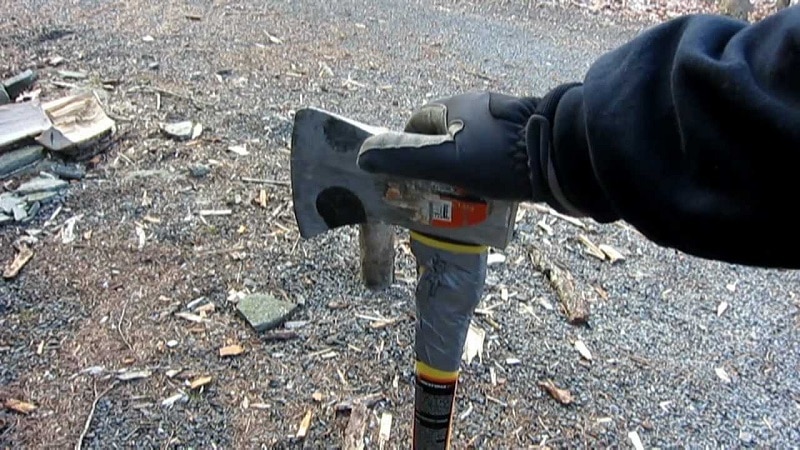
A safety notice should be addressed to those of you who are completely inexperienced – it is not only fun but also instructive to practice a minimal way of leaving along with the most rudimental techniques, but it is not wise to assume that everything will work out as it’s written on the paper.
What you always have to remember when thinking about the wilderness is that it can and most likely will bring upon you one surprise after another.
One can be pleasant, the next can be cruel – you can’t physically be prepared for everything, but you can take care of a few and trust that you will find an ingenious solution, maybe another one that your ancestors used for the same purposes.
[the_ad_group id=”23″]
Sharpening your axe with something that may happen to be on you or can be found in your immediate vicinity, or maybe it’s that specific rock that can only be traced further up the river, using another element than the predestined one makes you more conscious of everything around you.
It’s a step into a way of living that is more connected not only with nature as in the wilderness, but also to your own nature as you become more creative when left with no other choice.
You are bound to look inside to find the solution as there is no one outside to point it for you. And the solution will thus best fit your needs.
After such an attempt you will start discovering more and more purposes in the natural elements dispersed along your path, things that passed unnoticed before. And along with this journey, you will feel more independent therefore more confident and secure.
You will stop emanating fear and instead rely on the relation that is slowly building between yourself and every other animated living organism around you.
And the next natural step will be to build yourself a rock axe while on one of your wilderness adventures, though this is an endeavor that you have to dedicate much more time and energy. Also if you find some other ingenious methods, we would be curious to explore them through you.
For expert review of the top survival axe that you can use, check out our earlier piece on this important topic.




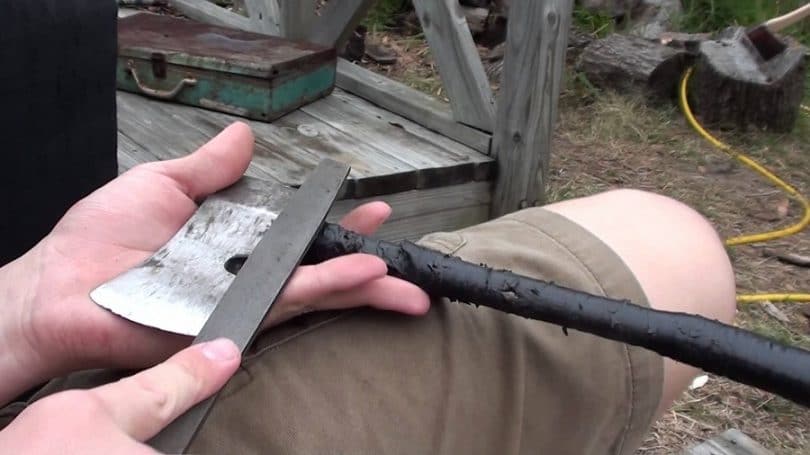
I’ll generally try to have my axe professionally sharpened prior to any extended camping or backpacking trip, however, as many of you know, after a few weeks in the forest your axe is probably going to start getting a little blunt. Where possible and room permits, I’ll take a bastard file on my trips, using this and rocks in the area, you can usually sharpen enough to keep your axe going a little longer, I generally only do this as a last resort though, as it’s not the easiest thing to do.
Taking a bastard file is quite a neat idea to keep your axes sharp wherever you go. It also promotes even sharpening, a feature that is not achieved by conventional rock or stone sharpening.
One of the biggest problems I find when trying to sharpen your axe away from the comforts of your garage or workshop, is trying to keep it secure. In the past, I’ve attempted to do this by holding the axe between knees or by sitting or standing on the handle, you name it, I’ve probably seen it or tried it.
A few years ago, however, I ran into a retired scout leader and he taught me a pretty neat trick. Take some tent stakes (the old shepherd’s hook kind) and place them over the axes handle, then elevate the handle slightly using a branch or piece of wood, so the blade doesn’t touch the ground. If you have nothing to hand to elevate, face the blade upward and stake the handle into the ground as securely as you can (though this method isn’t quite as effective). Then simply use a file or stone to sharpen as you usually would.
Not the best solution, however, if you don’t happen to have your trusty vice in your backpack, it’s definitely easier than trying to secure it with body parts.
You should always put safety as your first consideration. If it tends to become too wobbly or feels like it will slip anytime, better to just sharpen your axe in the workshop.
Amazing article Dennis! I really liked the caution section as you really noted some of the mistakes that I was doing every now and then, such as keeping my hand too close to rock. i am thinking of using a rock that is longer. Moreover, I also would like to suggest to sharpen the blade while putting on the end of a table. That is more safe. Overall, it was a really helpful content Dennis, I really hope that you keep writing such quality content! Kudos!
You’re welcome, Jerry! The end portion of the table is one of the more stable parts, but regardless of where you are planning to sharpen your axe, you must ensure that the blade is very secured.