How to Make A Paracord Lanyard: 3 Different Styles for The Same Outcome
Organization is one thing every survivalist should aim to create. And this is why one of the things every survivalist should learn is how to make a paracord lanyard.
Whether you are hiking or bugging out, your bag is going to serve you better when everything has a place. And, using lanyards, you can arrange small things by colors or in any other way you like.
[the_ad_group id=”21″]
Using a paracord lanyard you can hang things from your belt or your neck. Maybe you just want to keep everything inside your bag in one spot. This ease of organization made paracord lanyards quite popular among survivalists.
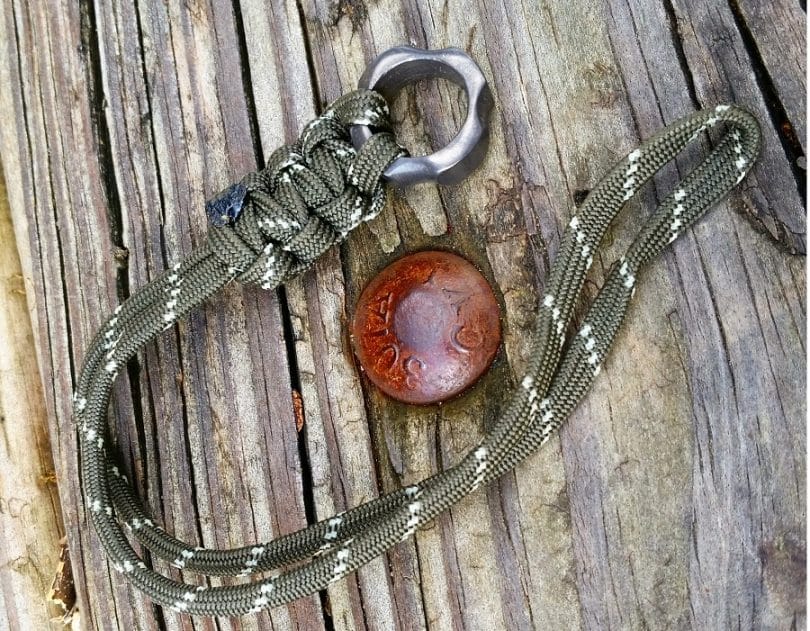
They are a fairly easy DIY project and you can make one or a dozen and offer them as gifts. So, to help you out with the organization, we’re going to discuss 3 different styles to make lanyards out of paracord.
The instructions might seem a bit complicated, but after you first one, you will be able to hurry through the rest.
Tutorial On How to Make A Paracord Lanyard
Supplies You Will Need to Make a Paracord Lanyard
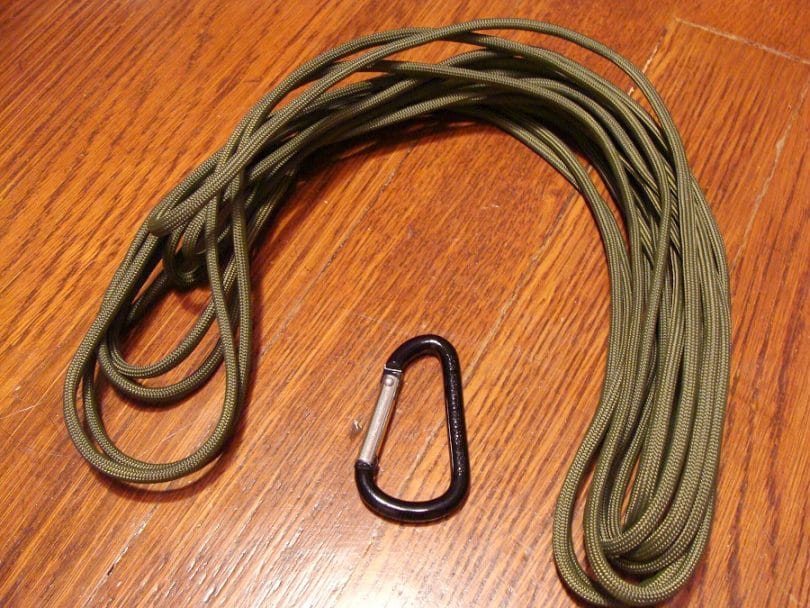
- Paracord 550 in two different colors – paracord is a thin, nylon rope durable enough to be used in a wide range of survival operations. Inside, it has 7 to 9 strands of nylon which can be used separately.
- Carabineer or a snap hook
- Lighter (for sealing the ends of the paracord)
- Scissors for cutting
Instructions for a Lanyard out of Paracord
- For a basic paracord lanyard, you are going to need 2 paracord lines. It works best if they are two different colors; this makes it easier to make, as well as more aesthetically pleasing. Select any two colors you want.
- Hold the two ends together. Take the lighter and melt the ends of paracord. This is going to allow them to stick together. Hold them together while it cools down. You need to make sure it is strong and going to stay together. You should have one longer cord instead of two separate cords. Give them some good tugs to ensure the melting paracord will hold.
- Once you are sure the two cords are stuck together, get your carabineer or snap hook. A carabineer is the most popular option. Fold the joined end of the cord and put the carabineer through it. Then, thread it through itself. This will create a little knot.
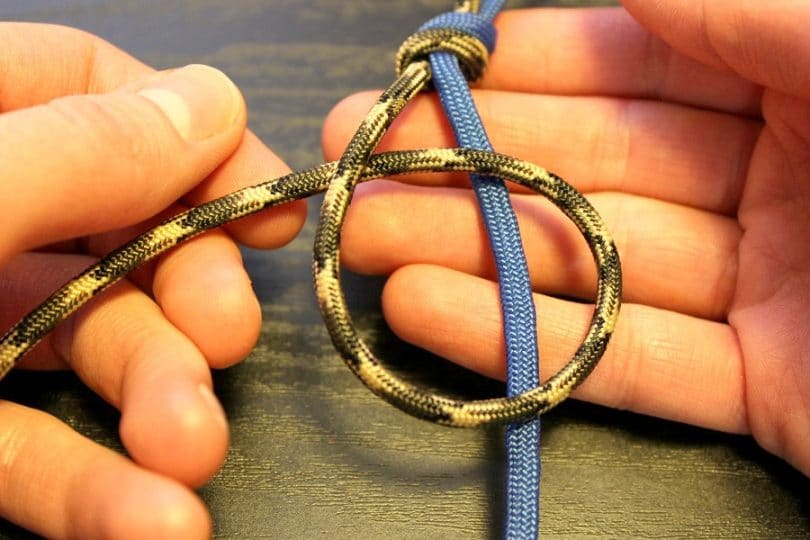
- Now comes time to start making the lanyard! Separate the two colors and decide which one to start with. Pick up the starting color (for ease of instruction, we will make this color blue) and make a loop.
You are going to thread the opposite color (silver) through this loop. Pull that other color through the loop. It is important not to tighten it too much at this point. - This is going to be the basic pattern for the whole paracord lanyard. Now, with the silver paracord, thread it back through the blue cord. This creates an almost identical loop. Now, take the blue color and thread it back through the silver paracord.
It is important to pay attention and know the order of the steps, as well as the color. You want to make sure you don’t miss a step, otherwise it is going to very noticeable. You can decide if you want to thread from the side, above, or below. So long as the order stays the same, everything should look great. - For your first row, you have to thread the silver through the blue one more time. This is the perfect time to start tightening. Check to make sure everything looks ok! When you pull the silver through the blue one more time, it will create another loop. Keep the blue cord in it.
There will end up being two silver cords. Now, it is time to flip it over. - After you admire your first row, you will notice, on the backside, there are two blue cords in a silver loop. The colors will change based on which side you are looking at the cord. Yet, the pattern isn’t going to change.
- You have to tighten this knot, and you will have to pull a new cord through the loop. This is accomplished by taking the blue cord and pulling it through the last silver loop.
Then, you have to thread it over the blue loop with a silver cord. This process is going to continue over and over again until you reach the desired length of your lanyard.
Make sure you keep tightening the lanyard. You can make short or very long paracord lanyards; this is entirely up to you. - Once you have reached the entire length of your lanyard, it is time to close it up. You aren’t going to use all of the paracord for the lanyard. Some of it will be for the actual lanyard that goes around your neck.
Make sure there is enough cord left to comfortable go around your head. It may be a good idea to mark the cord ahead of time so you know when you have to stop.
[the_ad_group id=”22″]
You don’t want the cord to choke you! Use a lighter to seal the area at the end of the braid.
Other Ways to Make A Paracord Lanyard
There isn’t just one way to make a lanyard; there are multiple different patterns and designs to create one. Also, you don’t have to make a lanyard that goes around your head.
See also: Paracord Survival Belt: An Ultimate DIY Guide
You can make it just large enough to go around your wrist. With a smaller wrist lanyard, you can attach it to your key chain or multi-tool knife so they are always in reach.
For a smaller, wrist lanyard, you need about 5 feet of paracord. You can either use 5 feet of the same color or 2.5 feet of two different colors. If you select two different colors, you are going to have to use a lighter to melt the two colors together to make one long cord.
- Find the center of the cord. This is where you need to put your attachment. Typically, it will be either a carabineer or a swivel clip. You want the attachment to be at the center of the folded cord. This way, there will be 4 cords to work.
- Decide how long you want the actual paracord lanyard to be. A good length is 5 to 7 inches. Make sure to place a mark where this measurement lays, so you leave enough room for your wrist.
- This stitch is called the cobra stitch or weave and here is how you are going to do this:
- You should place two cords down the center and two off to the sides.
- Take the cord all the way to the right and place it under the center cords. Drape it up and over the left side cord.
- Then, take the left side cord (it has to be under the right cord) and bring it over the center cords. Take it through the loop from the right cord. This is going to resemble a pretzel in some ways.
- Tighten this up and you have made your first half knot!
- Now, take the left cord and take it under the center cords. Then, bring the right cord under the left side cord, over the center cord and through the loop of the left cord. Once again, this is going to look like another pretzel.
- Pull it nice and tight. You want it right against the last half knot.
- In order to complete the lanyard, keep alternating these cycles until you reach the mark. It is important to make sure you are alternating the knots because it will create a twist if you fail to do so.
- It generally will take 8 full knots (both cycles) before you reach your mark. It may take more or less. Try to keep the knots as uniformed in size as you possibly can.
- You are going to have 4 cords after you finish the lanyard. This is more than you need. So, trim the excess cord and use a lighter to melt the ends. Melting the ends also helps to prevent fraying of the paracord.
- After this, you are done. The two center cords create a loop, so there is no need to tie anything for the wrist portion.
Still, the cobra weave is not the only way. Since lanyards are so popular, people have created and designed multiple different patterns.
Even more, lanyards don’t have to just be necklaces or around the wrist. They can also be attached to your keychain. The point is that the items it holds should be easy to access.
Another fun and interesting design for the lanyard is a snake knot. In order to do the snake knot, you need 4.5 feet of paracord. Once again, you can do a single color or two colors fused together. You also need some sort of attachment like a swivel clip or small carabineer.
- Fold the entire left of paracord in half. Slide the attachment onto the paracord. This will leave you with 4 cords, just as there was in the cobra weave.
- You are going to be making the snake knot around the center two cords, which is the wrist loop.
- Bring the right cord under the center two cords and the left cord. Wrap it around, bring it back over top the two center cords and through the loop on the right side.
- Don’t tighten yet! Take the cord on the left and bring it down and over the center cords and the right cord. Wrap it around back and put it through the loop on the left side.
- At this point, you can tighten, and you have made your first successful snake knot.
- Flip over the whole project, so the left cord is now on the right side. It is a great idea to use scissors or some kind of marker to hold up the loops from this point. Follow the same pattern listed above.
- Work the two cycles and then flip – it generally takes 10 full cycles to complete a snake knot lanyard.
Why lanyards?
You may wonder why so many people love to use paracord lanyards. They serve many purposes and they can be easily unraveled in survival scenarios, but you may also find uses for them throughout your normal life.
Even more, paracord has been used by militaries for decades because of its strength and versatility. If you aren’t sold yet, here are more ways you may be able to use a paracord lanyard.
- Due to its strength, paracord makes a great rescue line. You could use it if you or someone you are with fell down a large hole or is stuck in a body of water.
- If you find yourself in danger, you can make a tripwire with the paracord once you unwind it. Also, paracord makes a great set of restraints if you catch someone trying to harm you.
- With a bit of practice and trial, paracord can be made it into a great fishing net. If you remove the inner threads, it also is strong enough to be a fishing line. If you find yourself with a few fish, you could make a fish stringer with your paracord as well.
- If you are out of food, you can make a snare or trap.
- Traveling across water can be dangerous. You can use it as an across the stream guide as well.
See also: Types of Rope for Outdoors: Revealing The World of Ropes
Making a paracord lanyard is a great project for your survivalist bag. It only takes a few supplies and you could make quite a few in a matter of hours.
https://www.youtube.com/watch?v=A-hUyjK2RMc
The three patterns above are just a few of the ways you could make a paracord lanyard. You can make them as long or as short as you want.
[the_ad_group id=”23″]
Some people even like to braid the actual lanyard part, just for added paracord and decorations. Whatever you decide to do, making a paracord lanyard is simple. It is worth trying and adding a few to your bag!
For more useful tips on how to use your paracord for survival needs, see our article on this important topic.



This is the part where my wife loves helping me. I know how to create a paracord lanyard but I let her make them for me since she really enjoys making them. I always make snake know paracord lanyard because that’s the only way I know. My wife never gave me an opportunity to explore on creating one. But after reading this article, I got interested in trying other ways on creating paracord lanyard.
I can’t praise this material enough. Very versatile, colorful, and extremely durable. It is nice to know that you are doing activities which you and your wife and do together.
Great article, thanks Dennis. I have paracord lanyards attached to both my boot and pocket knives. I’ve been doing this for as long as I can remember, I do this for a few reasons. The lanyard adds a little extra grip when wrapped around the knife handle, which is particularly useful when I need a firmer grip, it also makes getting knife out of pocket or boot slightly easier, particularly when in an awkward position and need it and finally, the extra paracord is handy, should I ever need it in an emergency situation, it can be easily removed for the knife and utilised in other ways.
Thanks, Ray. The texture of the paracord material does improve grip without being too much of a dirt magnet. And even if the grip collects some dirt and grime, it can be washed with soap and water and it will be clean again.