DIY Backpacking Tent: Make Your Own Shelter
As you start packing for your backpacking adventure, you may start seeing the dollar signs going up and up as you buy ultralight equipment. After situating the right backpack, getting an ultra light sleeping bag, a mat and of course any liners you might need, you have just started to having your sleeping setup.
An appropriate shelter can be the most important thing you stuff into your pack, and is one of the biggest space monopolizers, next to water storage, that you will bring along. For more tips and tricks about sleeping in a tent, check out our must-read article to find out.

That is why it is essential to get a tent that is created or designed for backpacking, the fabric, the poles, and stakes are all designed to be ultra lightweight, durable and packed down. A backpacker’s tent will keep you safe, warm, and comfortable without breaking your back as you hike along the trail. It’s not just the big name companies that can make these tents, though, you can too.
See also: Best Tent Heater: It’s Not Just Hot Air
In this article we will cover the materials you need, considerations while shopping, and of course, how to assemble a DIY backpacking tent. With a little prior planning, you can create your own shelter out on the trail!
Different types of DIY tents
There are a few different designs to take into consideration when you think of the tent you will pack along. Each design can be made from scratch, depending on your outdoor savviness, and serve different needs for different camping conditions. Regardless of what type you pick, take into consideration the weather, the bug activity, and preparing for assembly out on the trail.

Try out your homemade contraption a few times to make sure you are confident in your shelter. This table below will help you determine exactly what kind of tent you should be after.
[table id=13 / responsive=scroll /]
What Goes into A Backpacking Tent?Each of these DIY tents is specifically made for warm weather camping, or backpacking when you are expecting at the most, a little bit of rain. If you are headed out to tropical areas that tend to flood or rain heavily, try the tent out before committing to a long weekend or even a few weeks on the trail. Icy weather? Do check out our piece on how to stay toasty and cozy in a tent for more details.
When you try to make your own backpacking tent there are a few considerations before you jump right into the creation, regardless of what type of design you end up trying to recreate. Some DIY tents require sewing and prior construction, so if that is the type of tent you are going for make sure to look into industrial sewing machines and sturdy zippers!
Fabric
A good backpacking tent needs to be durable, breathable, and protect you from the elements. The first step to creating your outdoor shelter is picking out the right fabric. Nowadays most tent fabric is made from ripstopnylon, preferably the fabric will be coated and treated for water resistance. If you are taking your tent out to a rainy destination than making sure you have high performing waterproof nylon is going to be essential.
Do not attempt to save money by buying a regular nylon, the ripstop features are going to save your trip, especially when you are hurrying to stow your tent away. A ripped shelter won’t provide you much in terms of warmth and comfort.

It’s not just the fabric outside of the tent that you should think about. If you are headed out on the trail, you may want to consider getting mosquito mesh to layer on the inside of your tent. In some areas mosquitoes carry dangerous diseases, so you want your shelter to protect you from their annoying and potentially dangerous bites. A common type of netting to use is the No-see-um mosquito netting.
When you are sewing the fabric of the tent there is an extra consideration, and that is sealing all of the seams. You can either get seam seal tape that is made for your specific fabric or you can paint on a sealant. For more easy tips on how to seam seal a tent, find out by reading on our earlier article on this topic.

Finally, the last piece of fabric to consider is ground floor fabric needs. You are going to want a sturdy canvas that is easy to clean, easy to dry, and easy to pack. You can either get a tarp to bring along or find silnylon, which is a tough material that will keep water out and is less likely to rip.
Poles
Your poles should be two things: strong and flexible. When you are making your tent, especially if you can not guarantee trees to hang your tent on, you want to have sturdy poles that will survive storms and traveling abuse. As you may already know, poles can get really heavy, really fast.
Using aluminum poles will gain some weight to your pack overall but they tend to be your least expensive option. For the backpacker looking for strong, flexible, and lightweight poles, your go to should be carbon fiber, wrapped in fabric.

Your poles your DIY tent can also be your own walking poles! They are sturdy, extendable, and are the light weight backpackers dream because they will serve two purposes.
Packing Down
At the end of the day, your tent will need to pack down to a relatively low size for a good backpacking experience. A tent is just one of the larger items that has to fit in your backpack and rather than just getting a bigger bag, we suggest getting more compact items. We suggest purchasing a stuff sack for any of your tent materials so that they can be compressed down even further.

Back Up Rope
What we have found is that it never hurts to bring along a spool of nylon rope, even if it is thin. Having the ability to set up guy lines, tie your tent up to a branch or a tree, or simply being able to wrap up placed pole can be the difference between your tent falling down or you sleeping warm and comfortable.
You are going to want to have a rope that is light weight but sturdy, we suggest nylon or polyester as they are less likely to bunch up in your bag, but won’t add too much extra weight.
Why DIY?
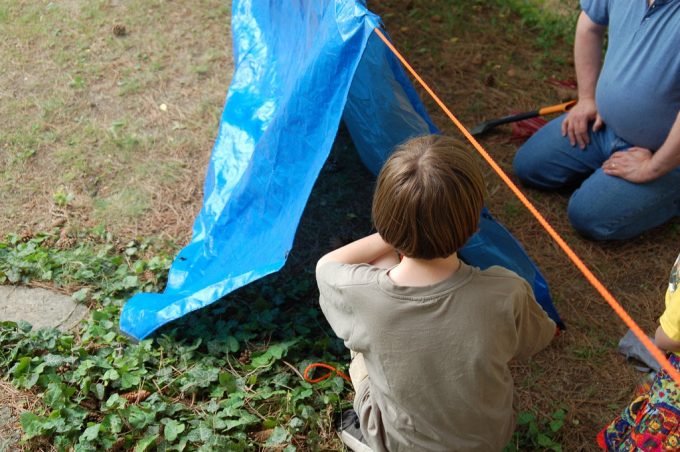
There are a few reasons why we love DIY tents and encourage you to make your first one for an outdoor adventure. First, is that tents that are designed to be lightweight and small can cost you a pretty penny. And while many of them are vigorously field tested, backpackers are not always concerned about comfort on the trail. Having an expensive tent does not necessarily guarantee you a good night’s sleep, so why not try to make your own.
Second, you can always customize a tent you make on your own, with a little sewing handy work and the right materials, you can make tent designs that suit your needs. Some backpacking tents don’t leave room for all your gear or have difficult to access entrances. When you make your own you can borrow tent ideas that you love, and add on extra features.
Finally, above money and customizing, creating your own tent, whether you are sitting down sewing, or quickly constructing, having a deeper understanding of camping equipment will only benefit you. Becoming an experienced backpacker and designing your own tents will only make you safer and more assured out on the trail. Making your own tent doesn’t have to be difficult, our DIY tent below only requires a little preparation and a can-do attitude!
How to make a DIY Tent
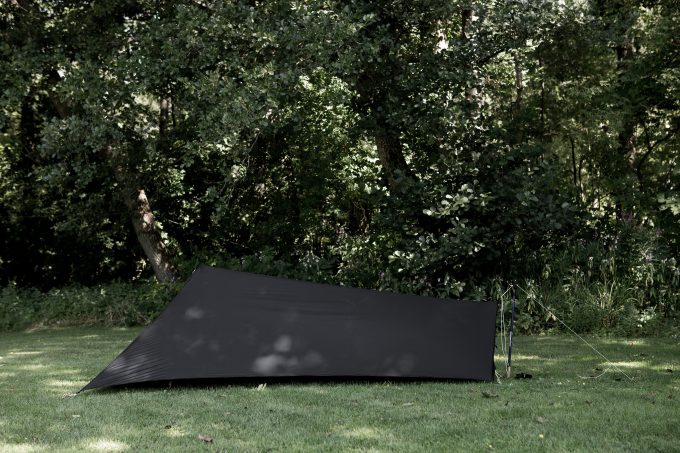
In this how-to, we are going to walk you through making a single wall A-frame, fully enclosed tent that is ideal for warm weather camping and will require only a few materials. Because you are fast assembling this lightweight tent and it is your only form of shelter, we suggest splurging a bit on the materials.

Really waterproof all your fabrics, and seal any seams or edges to prevent flooding or excessive condensation. This tent below is made for a solo ultralight backpacker.
What You Need:
- A silnylon (silicon nylon) light weight tarp, preferably rain coated, dimensions should be 300 x 300 cm or 120 x 120 inches
- A ground tarp, we suggest getting either a thick drop cloth or a durable tarp.
- Spool of thin nylon rope
- 5 pegs, or stakes, for support.
- One hiking pole that can be extended up
- Bungee Cord

How to Assemble the Backpacking Tent:
Step 1: Before we even start pulling out all our materials, we are going to scout for the ideal tent location. You will look out for areas that seem like they will pool water quickly, in the case of unexpected rain, and make sure that you have placed yourself perpendicular to the wind. Also, check the ground surface, and like you would do with any tent set-up, remove any uncomfortable looking rocks, sticks, etc.
Step 2: Lay out your nylon fabric tent, smoothing the fabric out as neatly as possible.
Step 3: With your stakes, peg out the corners and the center on the back of your tent, the back of the tent should be where you plan on having the worst weather directed. The stakes should face away from the inside of your tent, and the back of the tent should be staked until very taught.
Step 4: Then take the two front corners and bring them together, reach forward toward the center line of the tent and pull it up. Peg the two front corners down on the ground, this will create a slit opening.
Step 5: Extend your hiking pole fully out, and place it under the center line you bunched, creating a triangle shape. Make sure to push it firmly into the ground.
Step 6: To prevent the pole from sliding out we will take the bungee cord and secure it to the top of the pole around the tent fabric.
Step 7: To help shield yourself from the rain, tie the rope around the front flap and attach it to your extra peg inside. Rather than having rain coming through the slit you have now shielded yourself from rain and bad weather. This will also prevent sneaky mosquitos from slipping into your tent at night.
Step 8: While this may be enough for some backpackers, we like to throw down our ground tarp before setting up our equipment. This just provides us an extra layer between our sleeping bags and potentially wet grass.
Step 9: If possible, utilize your nylon rope as guy lines on the ground or to trees. This will provide some extra stability and give you a little more room. If it’s foggy, or condensation becomes a problem, having guy lines can prevent the tent from falling in.
About this Tent
A DIY tent has a lot going for it, the materials tend to be cheap, it can be assembled quickly in almost any type of terrain, and as a solo backpacker, you are getting a decent size accommodation without carrying all of the extra weight. The problem with these particular types of tents is that you aren’t getting as many luxuries as you would by purchasing one. Tents you buy will normally offer you warmer shelters, protect you better from mosquitos and other bugs, and will ultimately be more durable.

This type of tent also does not offer you a lot of ventilation, especially if you tie in the flaps, so it may feel more like sleeping in a bivy tent, rather than in the big lofty camping tents you may be used to. For a DIY project that you can do while on the trail, this tent offers protection, but not a lot else. After a night in the tent, you may find yourself wishing for mesh windows and zipped doors.
Ready for an adventure?
All that being said, it will keep you safe and dry, so that you can enjoy your ultimate backpacking adventure. DIY tents like this one allow for backpackers on a budget to enjoy the trail just as much as the ultralightweight gear heads.
Creating a shelter on your own will require a little forethought, having the right materials ahead of time, and being willing to be a little uncomfortable. For more useful backpacking 101 tips, do check out our article on this topic to find out.
With the right sleeping bag and sleeping mat, you may not even mind your own little home madetent! Do you have your own DIY backpacking tent that you want to share? Or an opinion on the materials we suggested? Let us know in the comments below!