
Paracord Uses: How to Put Your Paracord to Ultimate Survival Use
Any survivalist or outdoorsman knows that a piece of Paracord or parachute cord will always come in handy. This happens especially when you have nothing resourceful around to help you come out of an emergency situation. This is true mostly because there are a plethora of Paracord uses that can always pull you out of bad situations.
[the_ad_group id=”21″]
The biggest mistake you can ever make is being unprepared for the unexpected. In most cases, emergency situations will befall when you least expect and, if uncontrolled, this factor can destroy your ability to make an intelligent decision.
That’s why it’s important to learn about the many uses of Paracord and how to be creative with what you got. For instance, one piece of Paracord can be used as is, as a rope, or it can be used strand by strand in various situations.

The main purpose of this article is to teach you how to think outside of the box and improvise using anything you have around. And, in most cases, if you’re stranded in the middle of nowhere, a piece of paracord will go a very long way.
How to Determine How Much Cord Will Be Needed
Regardless of the Paracord crafts you decide to work with, a simple technique can be used to determine the length of cord needed:
- Measure the length of a small fragment of a strand of Paracord
- Tie a one-inch-long version of the design you intend to tie
- Measure the remaining cord
- Subtract the amount of the remaining cord from the total
- Take the amount needed to tie one inch of your design and then multiply by the inches required for the complete design.
Paracord Crafts for Survival Uses
Survival Bracelet
This is a great way for you to carry around a fair amount of parachute cord, which can come in handy when faced with an emergency situation.

You will need the following materials and equipment.
- 8 feet, 550-Pound Paracord
- Lighter
- Weaving support or bracelet maker – it’s great for beginners
- Scissors
- inches of curved plastic buckle (side release)
Steps to Follow
Step 1: Measure Paracord
Obtain your cord, measure and cut 8 ft. piece out of it. Then bring the two ends together and determine the center of the cord.
Step 2: Thread through the buckle
- Connect the male and female parts of the buckle.
- Insert the apex of the loop from the male opening.
- Thread the tip of the loop over the female opening and then open the buckle.
- Pull the loop over the female and tighten it by pulling it taut.
Establish the bracelet size by placing it loosely on your wrist. Then unbuckle and maintain the measured length between the male and female parts. To be able to weave correctly, you will have to buckle the male and female parts separately to similar male and female parts attached to the bracelet maker.
Step 3: Weave
Select the type of knot you want to make (our recommendation – start with the one that seems the simplest to you). Once you know the type of weave you are going to implement, follow these steps:
- Make a simple knot using the two separate threads of the remaining cord after measuring your wrist size.
- Tie the knot beneath the vertical cords.
- Repeat a similar knot, but this time around – it should run over the vertical cords.
- Go on with the weave while repeating the underneath and over knot until you reach the other side.
- Detach the bracelet from the bracelet maker and then tuck in the two ends of the cord to the footing of the bracelet.
Step 4: Trim ends of cord
- Cut the ends to about half an inch and then press them to expose the inner strands of the cord.
- Cut the inner strands to the desired length – without the inner strands, it will be easier for you to melt the outer cover.
Step 5: Close up the ends with fire
Use a lighter to burn the shattered ends. You should press on the melting ends with something firm in order to perfectly close the ends.
The ends will cool and close firmly after a few seconds.
Video instructions below:
Snare Traps
What will you do when you run out of food while in the woods? You should never be conquered by fear and panic; instead you should put your parachute cord to good use and build snare traps.

The materials and equipment you need are:
- 550 lb. Paracord
- Knife
- Pair of gloves
- Axe/ Knife
- Sticks
Steps to Follow
Step 1: Choose a trap site
Before you can do anything, you need to select a desirable trap site in the woods. An ideal site should be along animal trails, along small holes and near nests in trees.
Step 2: Get rid of the bark and mark the stick
Once you have selected your site, obtain a v-shaped stick and remove some of its bark using your axe. Make sure you wear your gloves while removing the bark on the stick. Then mark the stick’s end by using your axe and make it sharp-pointed for easy pushing on the ground.
Step 3: Measure and cut parachute cord
Measure the cord and then cut at your desired mark, such as three meters. Then pull out the middle strands of your cord. Go ahead and pull out the white strands, since they are the ones you will be using.
Step 4: Create a notch
- Create a stake and then make a v-shaped indentation on the other end of the stick, which will help you to keep the Paracord in position.
- Create a simple over hand knot on one side of your cord and then make a slip knot by pulling the other end through.
- Tie the other end to the v-shaped indentation on the stick.
Step 5: Hammer the sharp-pointed end into the ground
Now you can set up your snare trap, all you have to do is hammer the sharp-pointed end of your stick into the ground at an acute angle, such as 60°. Then open the hole by adjusting the Paracord end to approximately 10 cm and make it a few centimeters off the ground.
Step 6: Support your knot
Use sticks to support your knot a few centimeters off the ground. Preferably two v-shaped sticks will provide the ideal support and quick release when a target hits the mark. You can also check out our guide on how to make paracord duck call lanyard for more options.
And more you can watch in below YouTube video:
Paracord Rifle Sling
A rifle sling is a very important gear for carrying around your gun while out in the woods. It helps you to retain control of your firearm without necessarily holding it in your hands.
[the_ad_group id=”22″]
In addition, rifle slings made of Paracord will effectively distribute weight over your body.

The materials and equipment you will need are:
- Two rolls of 550 lb. Paracord (different colors)
- Lighter
- Pliers/scissors/knife
- Gun sling buckle
Keep in mind that you should know the cobra stitch effectively to pull this out.
Steps to Follow
Step 1: Prepare the two cords
- Set your rifle swivel and then prepare the two cords.
- Go ahead and fold the Parachute cords in half and then thread the cords through the designated swivel.
- Create a loop and then come up with a slip knot by threading the cord through the loop.
Do this for each Paracord. You are advised to use different colors, since it will be easier for you to weave, (green and yellow for instance). Place the cords parallel to each other in this order: Yellow-Green.
Step 2: Weave
- Start the weave by developing a half-loop with the green outer-right cord by setting it over the yellow and green cord.
- Then take the outer-right yellow Paracord and place it over the outer-right green Paracord.
- Go ahead and thread the yellow Paracord beneath the outer-left green Paracord.
- Then weave the yellow string through the green string’s twist and tie a knot. At this juncture, the yellow string will be on the right side of the weave.
- Take the outer-left green string and prepare a half-loop.
- Then place the green string beneath the yellow string you had weaved in your initial knot.
- Weave the string through the second half loop.
- Tighten the knot.
Step 3: Finishing
To finish the pattern successfully, you need to continue threading until you hit the end of the swivel. You should cut off the extra cords once you have reached your preferred length.
Video instruction on how to make paracord rifle sling for AR 15 below:
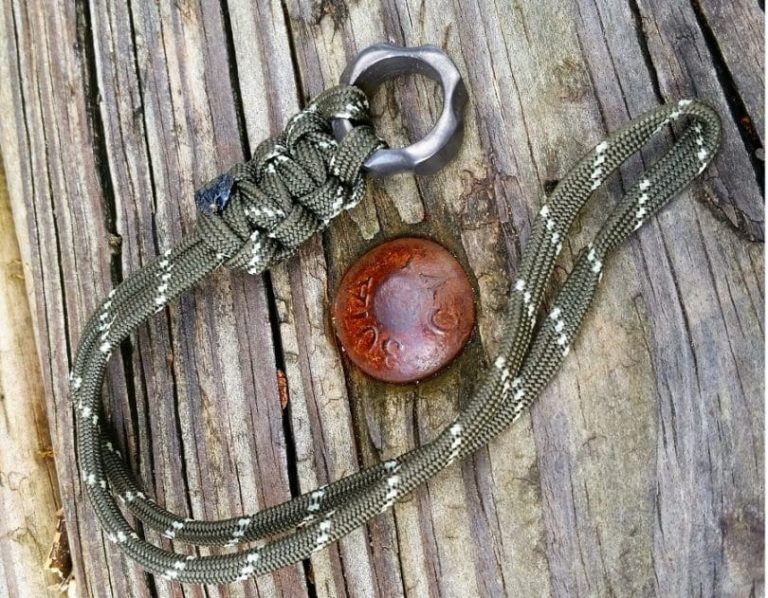
Quick Release Lanyard
Apart from helping you carry keys and identification cards around your wrist, shoulder or neck, you can use it to support you incapacitated arm.

A simple quick release parachute cord lanyard will require the following materials and equipment:
- Ten feet of Paracord
- Lighter
- Swivel snap hook
- Scissors
Steps to Follow
Step 1: Create the loop end
Locate the center of your cord and create a loop that should be the loop end of the lanyard.
Step 2: Tie the cross knot
Bring the string on your right over the one on your left, then back below to your right and back below to your left. This should create an S shape. Once you have developed the S shape, bring the left cord beneath the S outline through the upper loop. Bring the cord back downward over the first two sections of the S outline and below the bottom.
Step 3: Tighten up the knot
You then have to tighten the knot by gently pulling the threading ends and looping the ends. When you work slack from the twist end to decrease the size, you can effectively adjust the lanyard’s loop size.
Step 4: Tie the next knot
Go ahead and tie the second knot in similar steps as the first knot. Then work slack through your second knot till you have approximately one inch of space between the two knots. Continue creating knots till you have approximately one foot of strand left for each Paracord.
Step 5: Add your attachment
- Add your swivel snap hook by placing both cords through the eye of the swivel and then tie the snake knot.
- Bring the right thread below the cords and then pass it over the cords.
- Take the left thread over and across the other thread. Then back behind as well as under the cords. Then up via the right thread and then tighten.
Step 6: Continue threading
Now you need to take the right thread below as well as behind the cords and double back through the stiffened knot. You should tighten/loosen the knots with just your fingertips.
Step 7: Turn the lanyard over
Expose the other side of the lanyard by turning it over. The working strand should be below the cords now, back up and down via the parallel threads of the knot and then tighten. Go on till you reach the cross knot or run out of strand.
And you can watch in below video instructions:
Tourniquet
It is usually common to get a bad cut when fishing, hiking, hunting and camping among other outdoor activities. Your Paracord bracelet can come in handy when you have no first aid kit and you need to fix a bad cut. All you have to do is unweave it to obtain the appropriate size of the strand to make a tourniquet. Do read our guide on how to deal with emergencies effectively to get you prepared for any situation.

You need the following:
- 550 lb. Paracord
- A clean/ sterilized piece of cloth
- A stick
Steps to Follow
Step 1: Half knot
Place the clean piece of cloth on the cut and tie a half knot using the Paracord.
Step 2: Place stick on the knot
Obtain a stick of reasonable size and place it on the knot.
Step 3: Tie full knot and twist
Once you have placed the stick, go ahead and tie a full knot and then twist gently.
Step 4: Wrap tails and tie
Go ahead and wrap tails around the stick and then tie the tails in a nonslip knot to complete the tourniquet.
Do you want to know more? Read our tips on how to make a paracord granade to give you more options for your survival needs.
How to Master The Above Mentioned Techniques
As you can see, there are plenty uses for paracord, but you can learn how to use it properly only if own parachute cord and practice. You should always practice the abovementioned uses before you are presented with a situation that needs any of the mentioned uses.

With this article, we tried to cover some of the most important uses, but you can always get creative. With respect to the discussed uses, Paracord can be a resourceful and versatile tool for a hunter, a prepper, a survivalist, a fisherman, and a holidaymaker.
[the_ad_group id=”23″]
You will always benefit from Paracord as long as you know how to maneuver it to suite your situation. It is actually a very simple manipulation; all you need to have are proper tools and materials in addition to Paracord. To give you more information, see our guidelines on the different kinds of outdoor ropes to help you with more choices. What do you think we should add to make the above uses more helpful for you?


Originally, paracord was used for parachutes, but it quickly found acceptance, and was useful for making other things such as tent stretches, fishing line replacement, cord for ligation of the duffel bag, leashes and collars for dogs. Paracord dries quickly, does not rot and is not moldy, soft, light and strong. Really multipurposel thing, it is also a favorite among climbers.
It is indeed used for parachutes (hence para-cord for parachute cord). From there, its purpose branched out to wilderness and backpacking uses thanks to its proven reliability even under challenging environments.
When I need to carry a lot of paracord, I use daisy chaining. It is by far the most useful way to carry large amount of paracord. Your paracord will be stored tangle-free inside your pack and all you have to do is to is a single pull. In the wilderness, a paracord will do you favors you might not expect so be sure bring some when you decide to go to a survival adventure.
Daisy-chaining is one of the easiest ways to store paracord without taking up too much space. It ensures that you have enough paracord supply, and as you’ve said, saves you from the trouble of getting the cords tangled.