
Paracord Survival Belt: An Ultimate DIY Guide
If you are an outdoor enthusiast, then you know the real value of a versatile belt. And, the most versatile product of this nature is the paracord survival belt. First, unlike other survival goods, a belt doesn’t take space in the bag since it can be worn around the waist.
[the_ad_group id=”21″]
You can wear it as a fashion accessory for those long outdoor travels and when you are in some sort of an emergency situation, you can simply take it off and use it as a survival tool.
See also: How to Make Paracord Bracelet: Simple, Elegant And Surprisingly Useful
The important aspect here is to understand how a paracord belt is being employed. Once you are aware of the information and the steps required to unravel the belt, the knots and the loops, you are set to use it.

If you plan to make the belt yourself, knowing all these stuff definitely acts to your advantage. This is because now you know the exact mechanism for the product and you can undo it based on your own experiences. This is exactly what we are going to learn today: how to make the belt and how to use it in cases of emergencies.
Making Your Own Paracord Survival Belt
As we understand, a paracord survival belt will come in handy when you take off for those adventurous trips. This is why it is essential to know how to make one for yourself. Let us go through some of the steps involved in the process.
Materials required
The first information you would need here is what are the materials required for making the paracord survival belt.
- 550 Paracord – This is the first and an essential requirement for the whole process. The color can be chosen based on your preference. All you have to remember here is that you would need approximately 50 feet of cord for the purpose. This ensures that you never run out of paracord.
- Fastener – A belt buckle can be used as a fastener in this regard. Ideally, you would need a strong and tight fastener here for best results. For this purpose, you will come across both the plastic and metal versions. You can just get the plastic one when you are out in the open, but if you have a metal one with you, that would also do the job well. If you want to make the paracord adjustable, you could opt for the classic buckle.
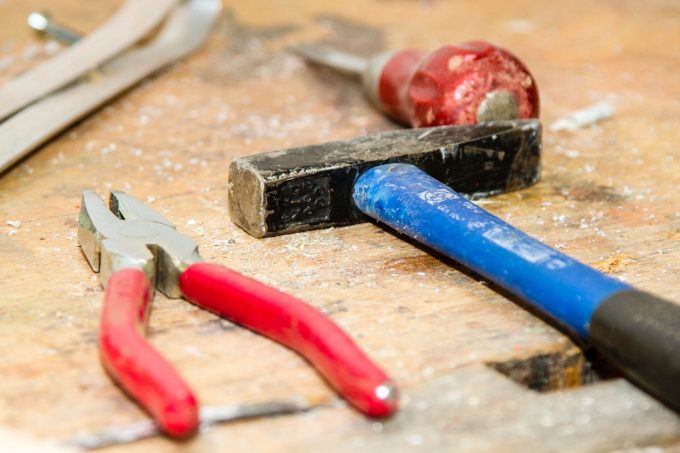
- Scissors – A sharp pair of scissors would be required here to cut the cord such that you can shape it to your needs.
- Lighter – When you are making the belt, you would need to have a lighter to burn the ends in order to keep them from fraying.
- Forceps – This requirement is absolutely optional. This means that you can use it only if you want it. If you out in the wild, without any forceps, it is entirely possible to manage without this. You could also make use of needle nose pliers for going making the belt.
Now that you have all the materials required for making the belt, it is now time we actually get to work. Here are some steps that you can follow.
And video instructions in the video above you can check.
Step 1: Seal the ends of the cord
First and foremost, you would be required to seal the ends of the cord by making use of a lighter. This ensures that the ends don’t fray and the cord stays well. When you are making it, make sure that you do not waste the material. This can be done by cutting the cord only when the desired length has been attained.
Now we come to the buckle of the cord. Using the plastic or metallic buckle, you could make 4 loops through the belt loop.

However, the loops should not be so tight that it doesn’t allow some extra thread to pass through it. Also, the cord will come with one specific ‘working end’. This is where all the operations of the procedure will be done. Once these processes are carried out, we can move on to the next steps.
Step 2: Making the first loop
The next step involves making a loop with the working end of the cord. This is simple and can be done freehand. Remember we already have made 4 loops on the buckle. Now this single loop is passed through the center of the other loops leaving out 2 inches on either side.
Thereafter, you could tighten up the loop, most preferably from right to left. This keeps the consistency in the loop and brings out the best results.
Step 3: Bring out more loops
Four loops were already made around the buckle. Now all we need to do is ease them apart and loosen them. Then, the running end of the cord is used to form another 4 loops. This is where you could also make use of your forceps if you have them.
[the_ad_group id=”22″]
Else, this process is entirely possible without using forceps as well. You could simply put your fingers to good use here. However, there is one thing to be borne in mind. Twisting the loop in the anti-clockwise direction is absolutely essential to facilitate smooth functioning. This will keep the left end of the loop in front. This completes the 3rd step in the process.
Step 4: Finish the first row
In order to finish the first row, all you have to do is loosen the first row by lightning the loops from left to right. How do you tighten the loops then? When you reach the right end of the loop, simply pull on the end sticking out from the left. This will do the job for you.

A piece of advice: When you are actually making the loops, the thread becomes twisted. So, as you go about tightening the loop, you would also need to un-twist it so that the final appearance is neat and not messy. Also, try not to excessively tighten the loop. This will only make your product look clumsy and untidy.
Step 5: Repeat all that you have done
The next step is simple. Whatever you have done in the last 3 steps, you need to do them again. More importantly, you need to keep doing so until such time that your rope becomes strong and you are confident about using it out in the open. If you have initially started with a 50 feet cord, you could be expecting a belt of about 32 inches. This is because, according to different tests, a 10 feet cord leads to a 6.5 inches belt.
Step 6: Completing the belt
So, as of now, you have cut the thread suited to your desired strength. Now, you can detach it from the reel and you are set with the belt. Thereafter, it is time to put the other end of the buckle to use. Once again, try to loop the working end of the chord through the buckle in order to get the stiff and perfect loops.
Once that is done, you would have two options ahead of you in order to proceed with making the paracord survival belt. The end of the cord can be put through any loop in the structure and then using a lighter, simply seal the ends. This will also keep the end in its position on the belt.
If you do not want to use the lighter in this case, you have another way to seal the product. After having threaded the end of the cord through any loop of your choice, simply tie a knot over the structure. This ensures that the cord does not slip out by any means giving you a safe and secure product. Now, you might be wondering which method is better to seal the product and give it the finishing touch.
If you opt for the first method, you would need a pair of scissors to cut through it. This is where the second method stands at an advantageous position. In cases of emergency or danger, you can simply untie the knot and you are good to go.
You wouldn’t need any scissors or other tools to get going with this survival belt. This definitely serves as a benefit for people travelling outdoors without few or no tools at their disposal.

These are more or less the steps you can follow in order to make the perfect paracord survival belt. This is one format given above. You can, of course, make amends to the methods and create a more customized belt for yourself. For instance, you could use as much cord as you desire based on the requirements of the product.
If the product you have in mind is longer in length, simply make 5 to 6 cords instead of the usual number of 4 as described in this set of instructions. This will give you a longer cord and a wider area. But you also have to ensure here that the buckle is wide enough to support the cord.
In the other situation, you could also employ 3 loops instead of 4 in order to get a thinner belt. Similarly, you can bring in some other modifications to suit your needs and get the ideal product for yourself.
Using A Paracord Survival Belt
Now that we know how to go about making this paracord survival belt, we can now move on to using it. How you use the survival belt will depend hugely on its construction and its mechanism of make. As we mentioned before, the easiest way of completing the belt is by inserting an overhead knot.
This makes the whole process of using the belt a lot easier. All you need to do is untie the knot and you can go ahead and use it. This proves to be especially helpful in case of emergency situations when you are short of time and need to do a lot in very less time.
The next objective here would be exposing the working end. For this, simply go about gradually undoing the loops you made in the cord, especially around the buckle. Then you could pull the cord through the first set of loops and voila! There goes your working end.

Once you have reached the working end of the cord, simply pull it hard in order to undo and disentangle the whole belt. Now, the time necessary to unravel the belt depends on how complicated its making process was.
In general, it takes about 20 seconds to open up the whole thing and put it to good use. Even though its takes quite a long time to make the product, it can be undone in a matter of only a few seconds.
[the_ad_group id=”23″]
However, your work can be made a lot easier if you are equipped with some tools like a pair of scissors or a knife. With these tools, you can simply dab onto to the wire, cut it specifically in order to reach the buckle end of the wire. Thereafter, you can pull on it and disentangle the whole length of the cord. See our experts review of the top 8 bushcraft knife for survival that you can use.
If you find the process of using a paracord survival belt a little too complicated or long, you can simply use the whistle at your disposal and ask for external help in case you are in danger. A set of two hands can definitely make the process easier.
Paracord Belts: The Perfect Survival Tools
When you are setting out on an outdoor adventure, a paracord survival belt is one of the must-haves in this regard. Being lightweight and stylish, you can sport it around your waist at all times. Make sure you choose the right length of the cord such that the belt fits your waist. You could customize the product by using as long a cord as you want and keeping as many loops as you want.

The more the number of loops, the wider will be your belt, which should also fit through the buckle. Besides, as we understand, making a paracord survival belt does not require too many tools or activities. With the basic amenities at your disposal, you can make something like that in no time to keep yourself protected.
For information on how to choose the different kinds of ropes for survival, see our must-read article on this.


Interesting thing. And really multipurpose.
I bought a similar to the one, you have on the picture.Can’t even remember the price, it was a small store with a tourist equipment. If I read this article, I would have made this belt with my hands, it seems easy. What fastener would you recommend to use: a steel, or a plastic one? Mine belt has a plastic fastener and works well, after 2 years of using.
It is not surprising that some beginner backpackers and outdoor enthusiasts are skeptic about the durability and usability of paracord. Regarding your belt, any material would do between the two, as long as they come from a reputable brand or store because we don’t want you to compromise your safety when it matters – which is all the time.
I think a paracord belt is a really awesome thing to have. Its usefulness is unlimited. It’s really cheap, especially if you weave it yourself. You can find paracord almost everywhere. Then you buy a buckle and start weaving. I find weaving really satisfying way to pass time. You just need to have a bit of talent for it and follow instructions on youtube. I really can’t believe that people choose to buy cheaper material when making it. It doesn’t make any sense to endanger your life because of a couple of dollars.
Not only it can outlast a conventional belt, it is also far more purposeful and versatile. All these advantages and still a paracord belt is way cheaper than the usual belt. It doesn’t come often when an accessory that is more useful comes affordable too.