How to Make A Water Filter: Quench Your Thirst with Clean Water
Have you ever thought about how to make a water filter? I know most of us brush off the idea since we haven’t been in situations which have pushed us to this point. It is good to appreciate that a water filter can be a life-saving tool in some dire situations. You could be stuck in the wild, where you only have access to muddy water or your location could be plugged with a constant supply of dirty water.
[the_ad_group id=”21″]
For these reasons, it is good to have an idea on how you could come up with a DYI water filter. The basic principle behind it is to create a model which is quite similar to the natural water filtration process in the hydrological cycle as water courses to the deep layers of the earth to form clean underground water. Though the resultant water is not entirely pure, this could be the first step or only step in getting clean water to drink.
As we all know, water is an essential element to our lives. By knowing this simple technique, you can survive in any area that has dirty water, for instance in the wilderness. It has been proven that human beings can go without food for a whole week, but we need water within three days since we can’t survive without it beyond that period. Check out more top tips on how to create a water filter to help you in your survival needs.
This article will help to explain how you can create your own water filters in different ways. This is suitable for your entire family and you should educate your kids on this simple technique.
Reasons as to Why You Should Create A DIY Water Filter
Before we delve into the finer details of the article, it is good to justify why we all need to know this basic technique. Though some might opt for commercial water filters, DIY water filters would be way better since:
- You are likely to use locally available and cheap materials
- It gives you the freedom to come up with your own water filter
- You can operate within what you can afford and try out new designs for your own pleasure
- It is generally cheaper and economical for you to make a DYI water filter
The Process of Making A Water Filter
Assembling the necessary tools
The basic concept and principle of operation of a water filter is to come up with different layers that can filter the water as it courses down. It is good to mention that the resultant water has to be boiled before you drink it, if possible. Below is a list of what you will require;
- A plastic bottle together with its top; to hold the layers
- A craft knife, to cut the bottle, to act as the outlet of the filtered water
- A hammer as well as a nail
- Coffee filter
- A mug or a large cup
- Activated Charcoal
- Sand
- Gravel
- A container for the collection of the filtered water
Preparing the plastic bottle for the process
Using the craft knife, you will then proceed to cut the bottom inch of the plastic bottle. This could be easily accomplished by sliding the knife into one of the sides of the bottle, then start cutting it in a slow manner. A simple way to go about this is adopting the use of short, back and forth cuts.
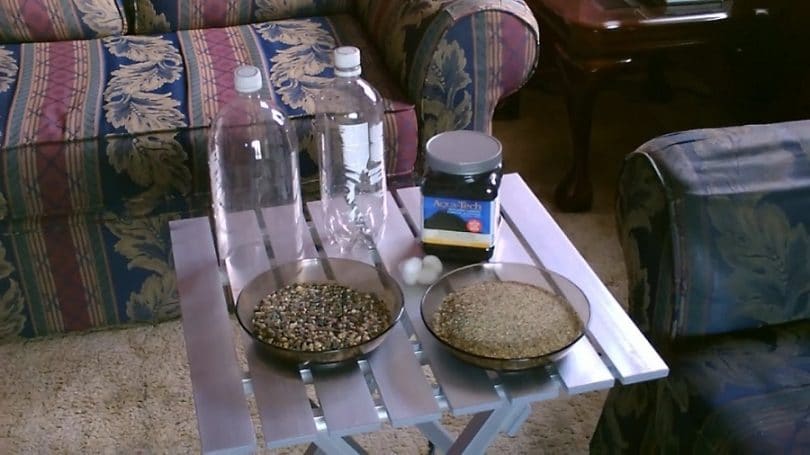
You can also create a handle for holding the plastic bottle. This could be attained by making two opposite holes just below the cut end of the plastic bottle. This could then help to suspend the plastic bottle with the use of a string.
With the help of a nail and a hammer, make a hole in the cap
By making a small hole on the cap that will be at the bottom of the filter, you will help to enhance the efficiency of the filter. This will be possible as the flow of the water being filtered will be slowed down by having a narrow outlet.
In case you don’t have the hammer and a nail, you could alternatively use the craft knife to create an X-shaped opening into the cap.
Place the coffee filter on the top of the bottle and then use the cap to tighten it
The essence of doing this is to maintain the activated charcoal, the immediate layer before this, in the bottle. This will also help the charcoal not to fall out of the bottle. The cap acts to hold the filter in place.
An alternative to using the coffee filter is the use of cotton balls.
Positioning the bottle with the cap in an upside down manner to fill it
You will need to place the bottle with the cap side down either into a cup or a mug. This action helps to steady the whole set up for filling up the bottle with the required layers. In case you don’t have access to a mug or a cup, you can lay the bottle on the table and then make it steady using one of your hands.
Filling 30% of the bottom of bottle using activated charcoal
You need to first ensure that the activated charcoal is in smaller pieces, thus large pieces can be crushed to smaller pieces with the help of a hammer or any hard object. Aim for pieces which are not bigger than peas. The purpose of the charcoal is to clean the water being filtered by adsorbing the impurities in it. Activated charcoal is more porous than the normal charcoal.
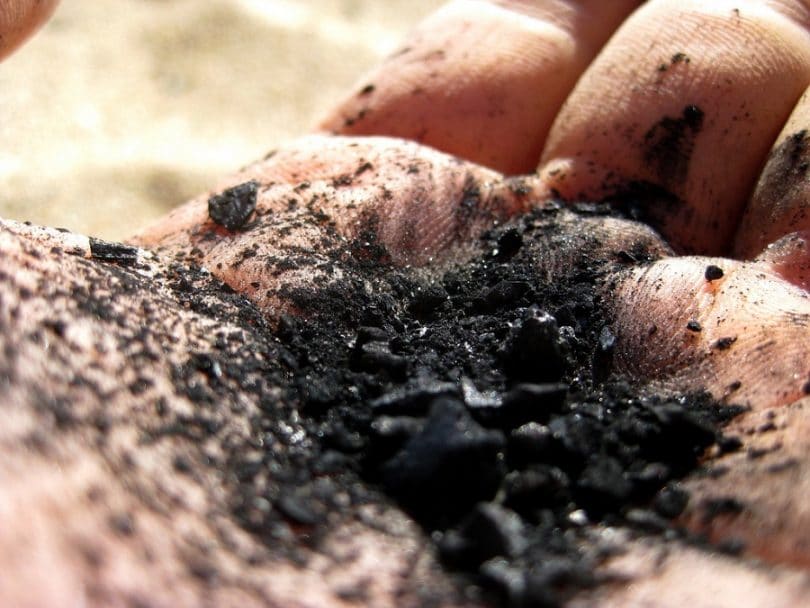
Remember to take caution, since working with charcoal is a dirty affair. You could make use of gloves while at this to keep the dirt away from your hands.
Proceed on and fill the middle third of the plastic bottle with sand
The next step will be to use any type of sand to act as the second layer, but it will be best if you don’t use colored craft sand. This is because it could leak dyes into the water being filtered.
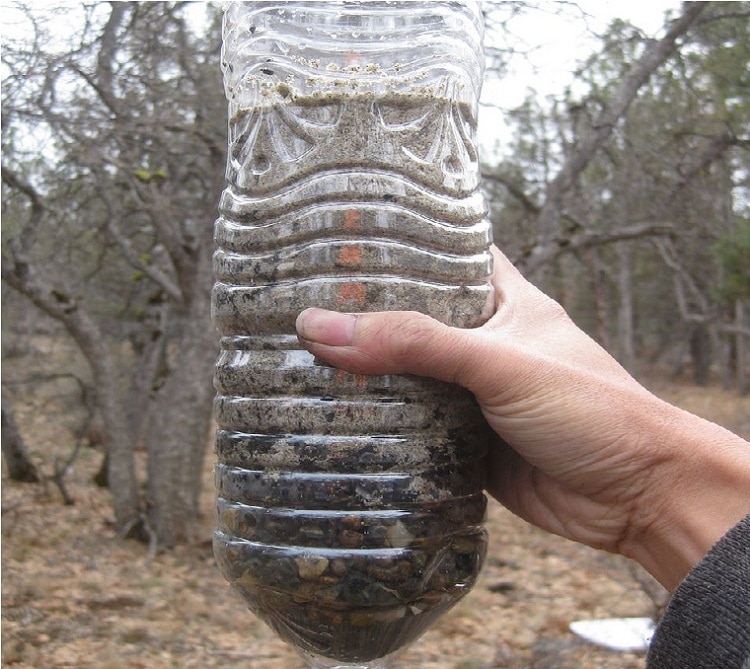
The layer of sand should be about the same thickness as that of charcoal. Putting into consideration what has been put in the bottle, you should be past the half way mark of the bottle at this point. It is advisable that you make use of two types of sand; fine-grained sand as well as coarse-grained sand. After the layer of sand, proceed on to add a layer of the fine sand, then the coarse sand will come on top of this.
Sand is used in the water filter to get rid of fine impurities that the layer of gravel couldn’t. Of note is that a biological zone is formed in the layer of sand as organisms collect in this layer. This will help to filter out the viruses, bacteria as well as parasites.
Fill the filter bottle with the last layer of gravel
The top most layer is gravel. You should remember to leave about 2 and a half centimeters (1 inch) at the top, a zone to hold the water after it has been poured for filtering to avoid chances of it spilling over.
You should make use of two types of gravel; fine gravel as well as chunky gravel. On top of the layer of sand, should be fine gravel and then the chunky gravel will come on top of this.
Gravel refers to some pebble-like rock which serves as a filter for the common debris in murky water; fallen leaves, small bits of wood sticks as well as some small organisms.
After following the above steps carefully, you will eventually end up with having a DIY water filter that can be used in the wild. You will have to test the filter to see if it’s functional.
How to Use The Water Filter You Just Made
Select a container for collecting the water which just has been filtered
See to it that the container you pick is clean and big enough to hold the water that will be filtered.
You could use anything ranging from a jar, pot, cup to a large mug.
Proceed on to hold the water filter over the selected container
Position the water filter in such a way that the cap is pointing directly into the collecting container. In case you are using a large container, you can place the water filter directly on top of it, ensuring that the whole set up is steady.
[the_ad_group id=”22″]
This will enable you to stop holding the filter by yourself, but if you included a handle in your water filter you can alternatively hang it up. Then the jar will be placed directly under the filter in this case. You can also check out our must-read article on how to choose the best gravity water filter for your needs.
The next step is to pour the dirty water in the filter
While at it, make sure you proceed in a slow manner to avoid the water from overflowing from the filter. In the event that the water gets to the top of the filter, you should hold on and wait for it to go down a bit.
When the gravel is seen again, you can add some more water.
Take a break and let the water flow into the collecting container
You will have to wait for about 7 to 10 minutes. The design will clean the water as it passes through all the layers, delivering clean water from the bottom end.
In the event that the water is not yet clear, pour it back into the filter
After you are done with the filtration process, indicated by the stoppage of dripping from the water filter, you need to examine the water that has been collected. In case the water is not clear, you need to slide a new clean jar under the water filter, then pour the collected back into the water filter.
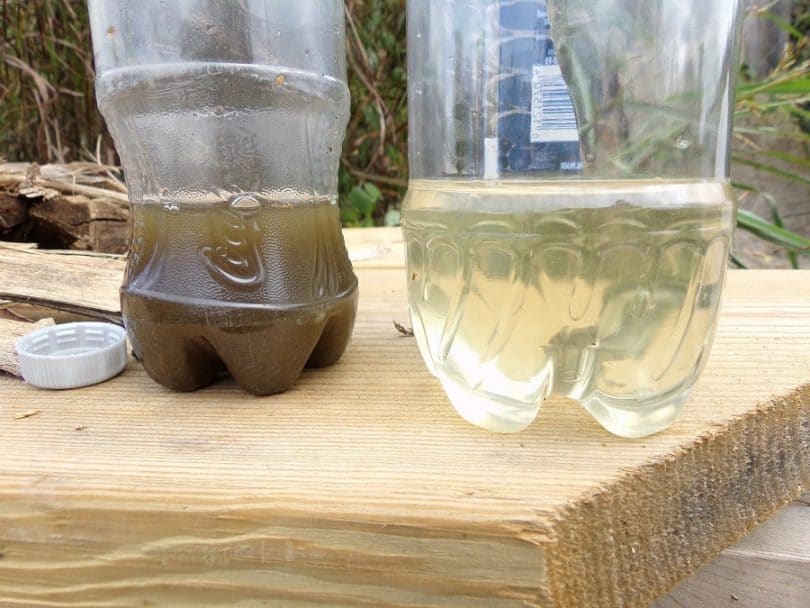
In some cases, you might need to repeat the filtration for about two to three times, before the water gets to be clear.
It is recommended that you boil the collected clear water
As much as the collected water is clear, chances are high that it still has some impurities; harmful chemicals, bacteria as well as other microorganisms. Boiling has been shown to be an effective way of dealing with these impurities. You thus need to boil the collected water for at least one minute.
See also: Best Water Purification Tablets: Top Products to Chemically Treat Water In Any Situation
For those living in high altitude areas, above 5000 feet above sea level, the collected water should be boiled for a longer time. The recommended time is at least 3 minutes.
Allow the water to cool and then store it in a clean container
After you are done with boiling the water, it is unwise to leave it standing for long. You should put it in a clean airtight container to prevent new bacteria from colonizing it.
By this time, you will have clean and safe water fit for human consumption.
Creating Different Types of Filters
Apart from making a water filter made in the above manner, there are other ways of making filters.
A filter made from just a Coffee filter alone
This is an appropriate filter for cleaning cloudy water. You will need:
- A coffee filter
- A rubber band
- A cup
You will need to identify a round cup-shaped coffee filter and then turn it upside down. Then proceed to fit it over a cup like a lid and secure it with a rubber band. The rubber band should be wrapped around the coffee filter to hold it in place.
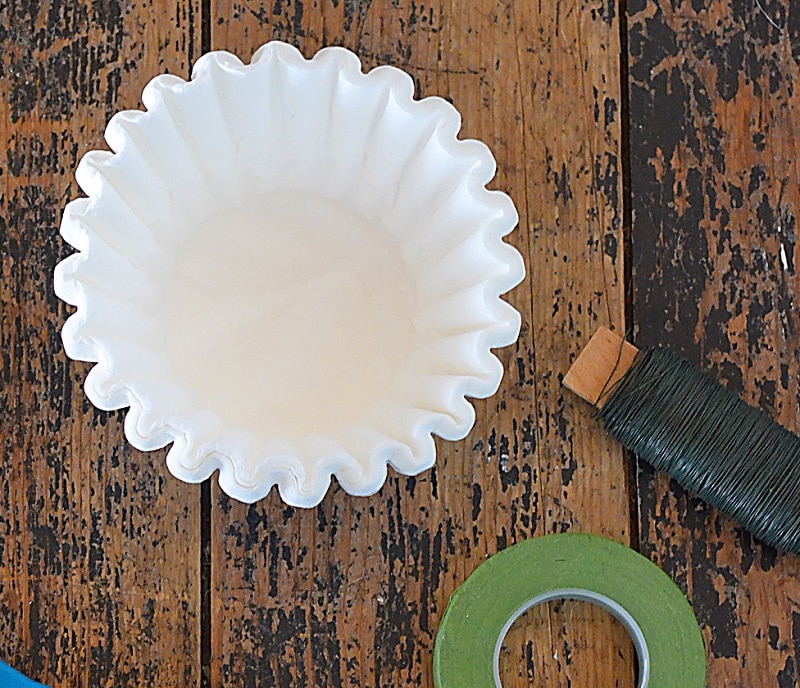
The cloudy water should thereafter be poured over the coffee filter and clear water will be delivered into the cup. Remember to boil this water before you consume it since it might have some impurities.
In case you don’t have a coffee filter, an appropriate alternative will be a paper towel or some piece of cotton fabric. Just see to it that it’s wide enough to fit over the cup to be used after being wrapped securely around it. It is recommended that you use only white fabric or blank paper towel instead of colored ones. The latter have been shown to drip their dyes into the filtered water, further contaminating it.
Making a water filter from Banana peel
The use of fruit peels has been shown to have the potential to get rid of bacteria.
What you need:
- Banana peels
- Cup
- A coffee filter
- A rubber band
First of all, you will need to peel the banana and then proceed to grind the banana peels with the help of a blender. The actual banana can be discarded or eaten since it has no role in this.
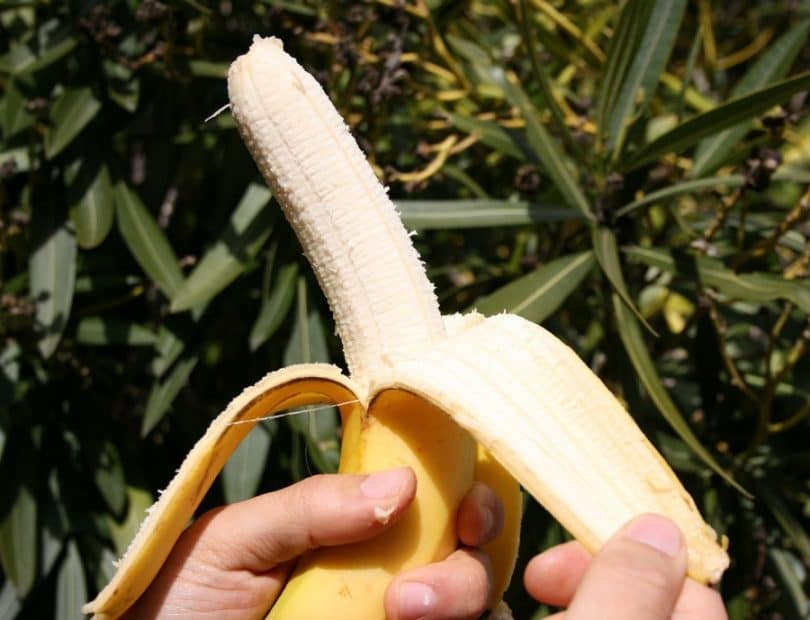
After blending the banana peels, you need to place them on a coffee filter that has been secured on top of a cup. You then need to pour the water to be cleaned through the coffee filter.
The banana peels serve to absorb the bacteria while the coffee filter will help to clear the water. You will need to boil this water before using it since it might have some impurities.
Making a plant xylem filter using a water bottle together with a pine branch
It has been proven that sapwood for instance pine contains xylems which could help in absorbing as well as filtering out bacteria and dirt. Research has shown that up to 99.9 % of bacteria could be removed from water using this method. However, this method is not able to get rid of viruses from water. For this reason, you will need to boil the water before consuming it.
You can come up with a xylem filter using the following procedure:
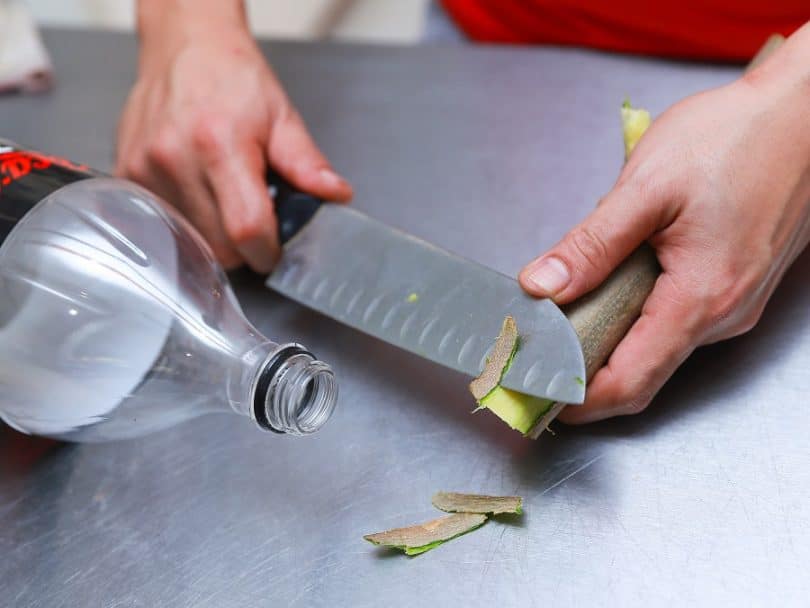
- First, you’ll need to cut a 4-inch long piece from a pine tree branch.
- Then peel off the bark from the branch and make sure that it fits into the neck of the bottle that you’ll use. In case you find it to be too wide, you can reduce its size to an appropriate one by use of sandpaper or a pocket knife.
- You will then slide about an inch of the branch into the neck of the plastic bottle.
- The other end of the bottle should be cut and thereafter the bottle should be placed in an upside down position.
- The last step will be to fill the bottle with water and give the stick some time to clean and eventually drip clean water.
It is better for the stick to remain wet when it becomes dry its efficiency is significantly altered.
[the_ad_group id=”23″]
Though this method gets rid of most of the bacterial contaminants in water, it is best to boil the collected water before drinking it.
In Conclusion
A water filter could be an essential element in your survival in a wild location, especially one that has murky water. It is also good for your kids to learn how to make this survival tool though care should be taken when they are cutting the bottle to avoid any injuries. You can also check out our seven practical ways to purify water for survival for more information.
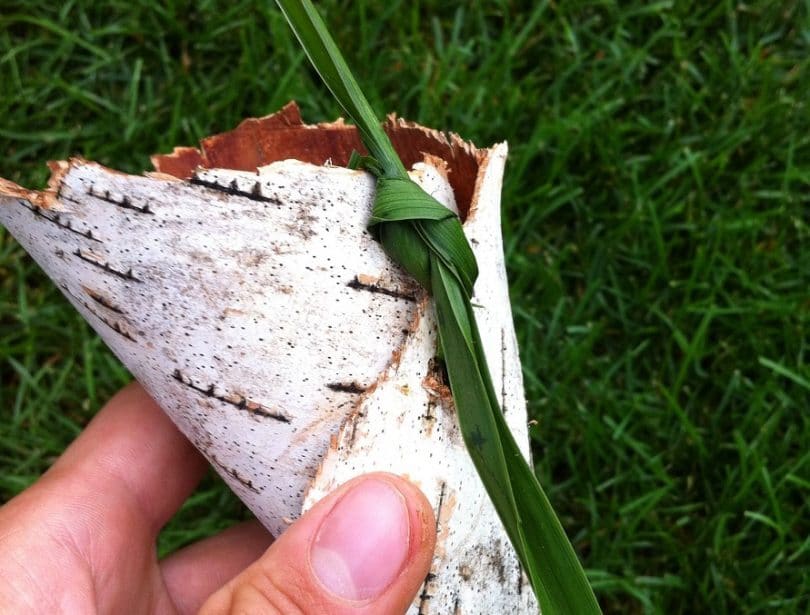
Water that has been filtered using a DIY water filter should be boiled since it might be having some impurities. You could also try out the other ways of making water filters, just remember to boil the collected water and store it safely. It is my hope that this article has been helpful, regards.


Though I agree it is important to have necessary skills to create a water filter for extreme conditions, with a little forward planning, I personally don’t think one would ever have to make a filter themselves.
When backpacking or hiking, it is certainly possible that you could find yourself in a position where you don’t have access to clean water, either you’ve consumed more than you anticipated or simply haven’t been able to carry enough.
Personally, when backpacking in remote areas for extended periods of time, I take along an item called the LifeStraw. The LifeStraw as you can probably guess is a straw shaped water filter that allows you to simply place one end into a water source (for example, a lake), whilst you drink from the other, giving you water that is 99.999% free of bacteria.
I have been carrying one of these for around 3 years now and have only ever had to use it once.
Lifestraw is the most convenient and most effective portable filtering device that you can use. It can filter hundreds of liters, and there are various models and pricepoints too. This is an ultra compact filtration device that will help you gain access to clean and potable drinking water.
This is an interesting article Dennis, thank you! One thing that has always confused me, however, is where people generally obtain the charcoal to use in most wilderness-made filters? I recall speaking to a guy who said that you can actually make your own using burned hardwood, has anyone had any experience with this or able to provide an explanation as to how this is achieved?
You’re very welcome, Chris! Regarding the burned hardwood, it can be utilized but for me it takes too much work. It would be better to stick with conventional filter media that you can collect around.
If I was in a survival situation I’d never drink water that isn’t boiled first. In that situation the only problem would be a vessel to hold the water. From all the ways you described I’d choose to filter water through a container filled with sand, gravel, charcoal and some material that would stop the sand from getting out of the container like cotton or grass. I guess that would work well enough to keep me alive and healthy.
Our objective when making your own water filter is to find and establish layers of filter to remove as much microorganisms and particulates as possible. Utilizing sand, gravel, and other filter. Boiling can be your primary option if you are not confident with the options that are available in the field.