How to Hang a Bear Bag: Top Methods to Keep Food Safe while Camping
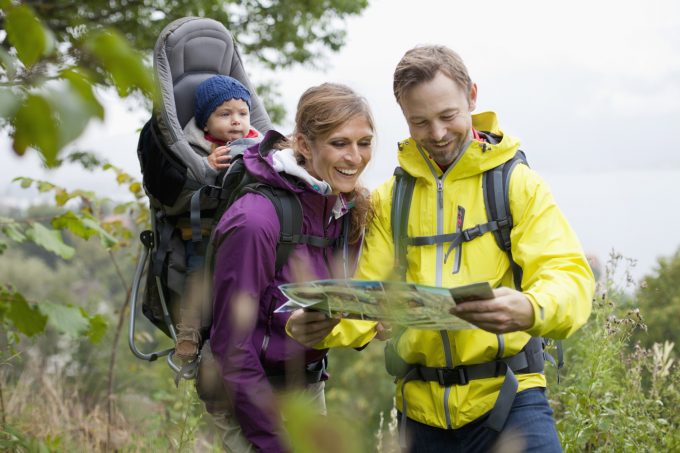
Camping is the number one choice for many when it comes to relaxation. However, you have to do certain things right on your camping trip – and a bear bag is one of them. Read on to learn how to hang a bear bag and the top three methods to keep food and other personal items safe while camping.
Since camping trips should be all about unwinding, you need to take all of the precautionary measures as to save yourself from a surprising bear visit – and no one is a fan of those, right? One way to do that is to keep everything tucked away safely in a bear bag.
For beginners, hanging a bear bag all the way up on a tree may look as an absolute mission impossible – but with a little practice, you’ll soon grasp the concept. There are several ways that you can do it and try them all before settling with a favorite – get ready to learn some new things!
Do you have to use a bear bag?
The answer to that question largely depends on the area you’re going to be camping at. However, most of the time, using a bear bag is highly recommended as it largely reduces the chances of any unwanted bear-human interaction.
Some national parks – and also some camping areas where bears have been seen in the past –require you to use some sort of protection not only for your food but for all personal items that give away even the smallest scent. Since bears are attracted to different smells, you’ll be required to pack anything that may give off an aroma to stay safe.
Bear bags protect not only against bears but also from other animals that might be interested in getting a taste of your food, such as foxes, squirrels, raccoons or chipmunks. You wouldn’t want to wake up in the morning only to discover your food for the weekend has been redistributed during the night, would you?
Things to put inside the bear bag
Here’s a list of the things that need to go in the bear bag.

- Food, no matter whether it’s dehydrated, regular, pre-packed meals and even things that are sealed – it needs to go up!
- Drinks, and even empty bottles that had something else inside except water.
- Any trash you might have – you’d be surprised how many people forget to put off any food remains or food packages in their bear bags. Don’t forget, trash still gives off a smell strong enough to attract not only bears but all sort of wildlife!
- Cooking pot, spoon, and any other cooking equipment that may lure in bears because washing them may not be enough sometimes;
- Soap, toothpaste, deodorant, lip balm, and every other hygiene item that gives away some sort of smell, no matter how neutral. Don’t forget to throw in your toothbrush in there as well. Bears are very likely to think of those smells as new and interesting and would want to investigate the matter further on;
- Insect repellant and sunscreen;
- Medicine – just make sure to take whatever you need for the night first.
Type of bag
In order for the bag to do its job properly, you’ll need to consider several things about it.
First, it needs to be tough enough to hold the weight of all of your valuables – you wouldn’t want to use a cheap plastic bag that will break once you lift it up in the air. If the bag isn’t sturdy enough, birds and insects may give a go at it, potentially leaving you without some of your items.

On top of that, it needs to be waterproof and preferably, with a strap on the opening, so you can seal everything inside. You can never be sure when rain may hit for the night and ruin most of your possessions.
Doing the investment and getting yourself a decent bear bag may pay off more in the long run, as you’ll get to reuse it multiple times. To see how fast bears run, read our informative article that you can use.
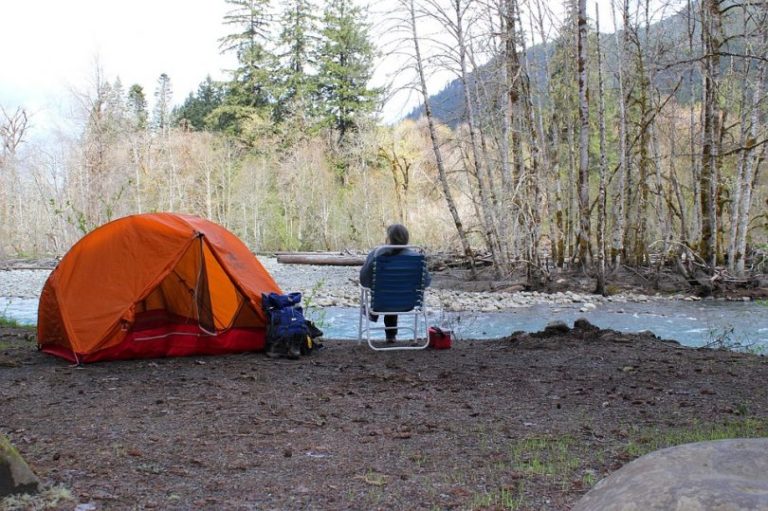
Plan, plan, plan
Before proceeding on with the actual methods, you’ll need to carefully pick the tree on which you’re going to hang your bag at. Then, work on strategically placing all of the other areas of the camp – your sleeping and cooking area – around it.
You wouldn’t want to underestimate bears – even though your bag will be high above the ground, they’ll still be able to smell it! Sometimes, they may give it a go and try and reach your bag as it is, so try to minimize any possible interactions.
Always try and hang your bag as far away from campsite as possible while ensuring it’s downwind from the campsite.
Top Methods
Here are the top methods that have been popular the most with campers throughout the years. Remember that it may take you a while before you become an expert in any of those, so don’t give up on the first try.
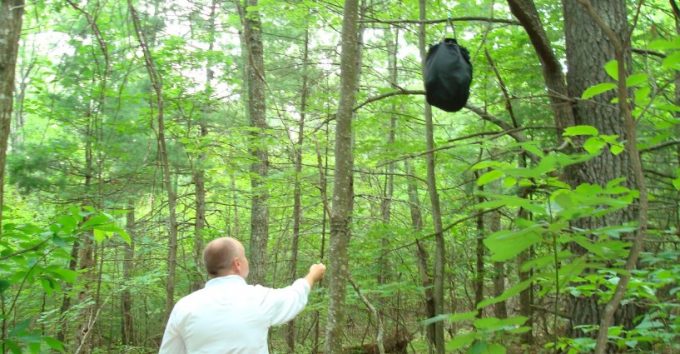
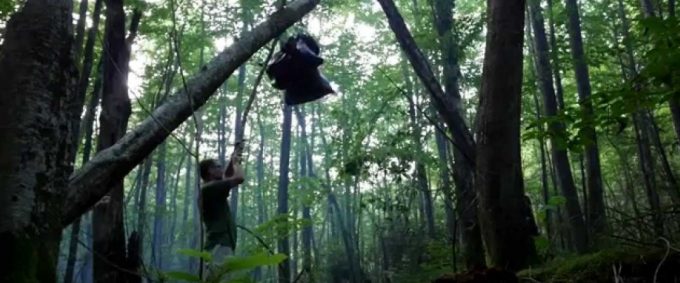
The Basic Method
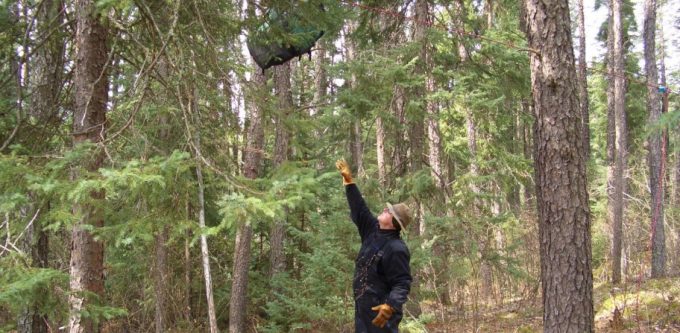
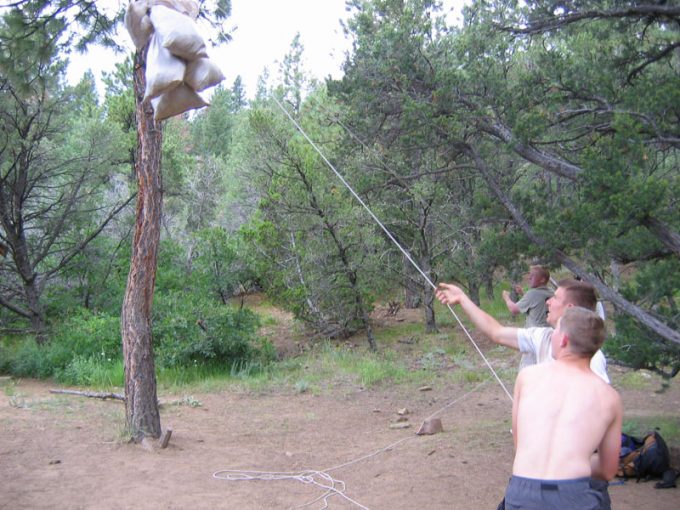
The basic method is the easiest method when it comes to hanging a bear bag because it doesn’t require much of a throwing skill. This one is highly suitable for absolute beginners, though you may want to practice a few times in your back yard before actually going out in the wild.
See also: Odor Proof Bags for Backpacking: 9 Top Picks for You
On top of that, this method works great if you’re looking to provide basic protection from other animals, birds or insects. The only problem with this method is that bears are so smart, that in some areas, they’ve figured out that the bag is going to drop to the ground once they bite through the diagonal part of the rope.
Quite the surprise to wake up in the morning to, right? If you’re camping in bear country or in any other place where the chances of a bear crossing in your path are high, it could be for the best to try out a different method that offers a better level of protection.
Materials:
- 20-25 feet of rope
Step-by-step guide:
- Find a tree with a suitable branch.
- Throw one end of your rope over the branch. Let the other end fall freely to the ground.
- Tie the food bag to the end on the ground. Make sure the knot is secure.
- Pull on the free end of the rope and get the bag as high as possible.
- Tie the remaining part of the rope to the trunk of the tree.
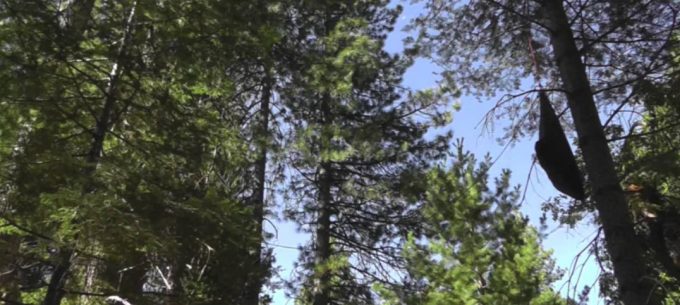
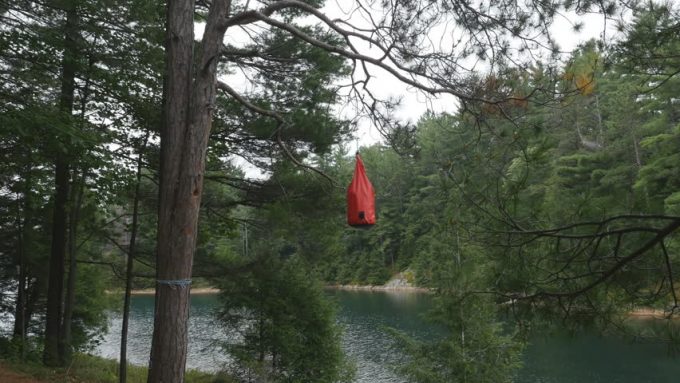
The branch needs to be 12-15 feet above the ground. Be careful to check for things underneath it – such as rocks or other thicker branches – that could support the weight of a bear. Apart from the height of the branch, it needs to extend at least 6 feet away from the trunk so the bear wouldn’t be able to reach it even if it climbs on the trunk.
On top of that, even though the branch needs to be thick, it shouldn’t be too thick – otherwise, it’ll be able to support the weight of the bear! Look for branches that are 1-4 inches thick, meaning they’re strong enough to not break on the weight of the bag, but not strong enough for a whole bear.
Go around the trunk several times with the rope and tie a good knot. Don’t forget that the bag will fall down unless the other part of the rope is tightly sealed around the trunk! Whenever you decide to take something from the bag, untie the rope and slowly lower the bag.
Be careful when doing this, as doing it fast may cause the bag to crash to the ground and break some of your possessions.
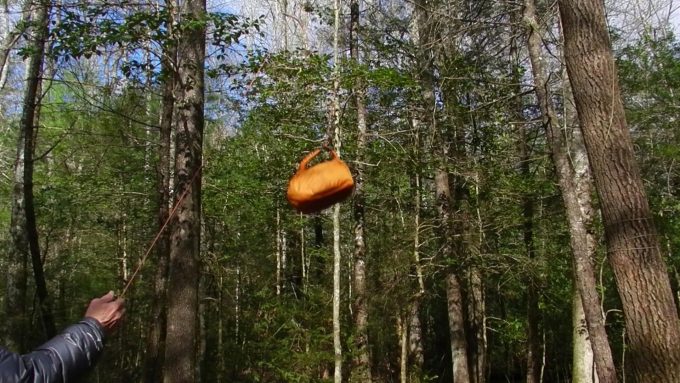
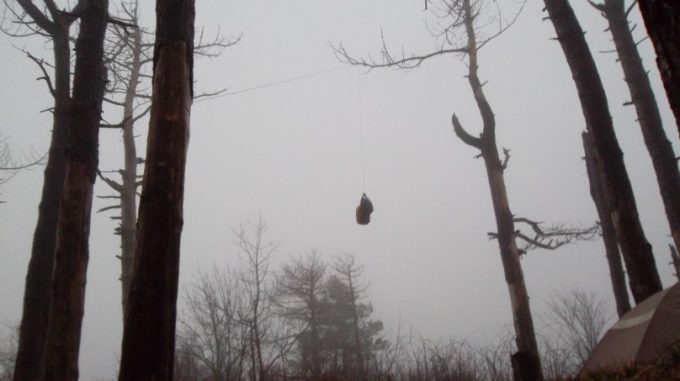
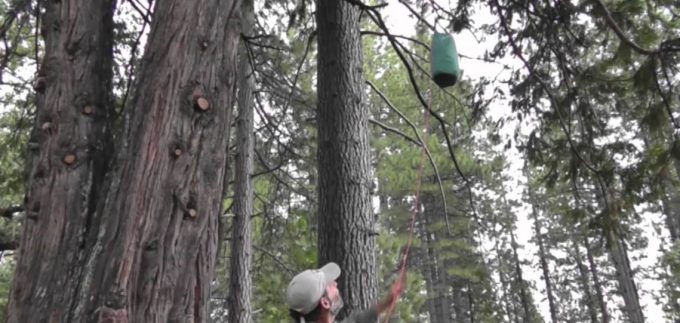
The PCT Method
The Pacific Crest Trail Method, or shortened to PCT, is the favorite method of experienced campers and camping enthusiasts. Since there aren’t any ropes that are hanging around, the bear doesn’t have a chance to chew any of them, thus making the bag drop.
Another good reason is to go for this method is that it allows for a so-called quick access to random items you may need once you put the bag up, such as toiletries. You could easily clip a smaller bag around the toggle – when you pull on the rope, the ditty bag will go down, and the bear bag will go up.
There won’t be a need to bring down the whole bag down for one item! However, some may be experiencing difficulties out of a couple of reasons. First, you need to find a tree with an extra height, because the bag drops a bit when you release it.
On top of that, if you’re bad at throwing, it could take you a while to get the rope right considering the height of the branch. Also, if you’re a total newbie, you could have problems tying the knot at the end. But don’t dismiss the PCT until you’ve tried it – you may be surprised by the final result!
Do check out our piece on how to select the best bear canister for your use in bear county.
Materials:
- 40 feet of rope
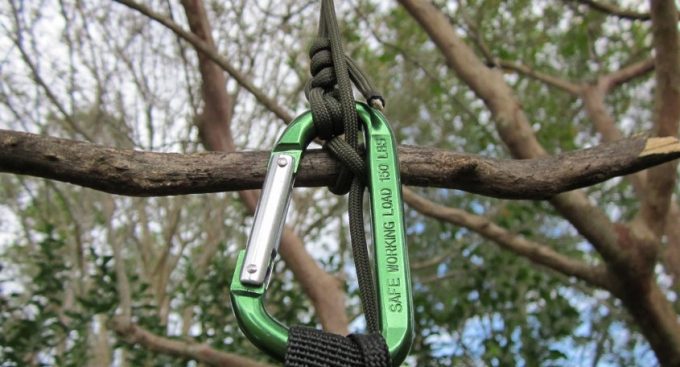
- A carabiner
- 1 stick; 7 inches in length, 1 inch thick (something like a twig)
Step-by-step guide:
- Find a tree with a suitable branch. At least 20 feet high.
- Attach the carabiner to one end of the rope. This is where you need to attach your food bag to the carabiner as well.
- Put the other end of the rope through the carabiner.
- Pull the other end of the rope so you hoist the food bag into the air. Make it go as high as it can.
- Hold the food bag in the air and tie a stick to the end of the rope by using a clove hitch.
- Start to slowly release the rope.
You don’t have to worry about objects under the branch. However, pay attention to choose a branch that will be thick enough to hold the weight of your bag but not the weight of a bear. You’ll notice that the stick will start moving upward and the bag will go down.
Eventually, the stick and the bag will meet and the stick will get stuck in the carabiner, thus making the bag stop midway. Whenever you want to get something from the bag, pull the dangling part of the rope.
The jam stick will lower, thus enabling you to remove it and lower the food bag.
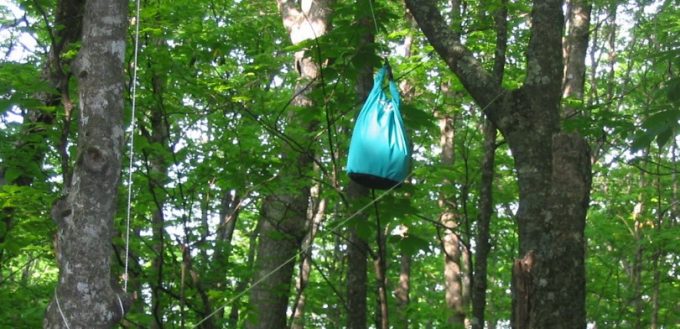
The Two Trees Method
The two trees method works well for people who can’t throw the rope very high. If you’re worried about the throwing part of the job, this method could prove to be the best one for you. On top of that, finding a suitable tree – or in this case, trees – seems like an easier task if you’re in a thicker forest.
However, even though you don’t have to throw the rope as high as in the previous methods, you do have to throw it two times. Remember that in order for this method to work, you’ll also need to bring a significantly longer rope, which some campers may find troubling when it comes to carrying extra weight with them.
Materials:
- 50 feet of rope or more; (you could also do two ropes, each out of minimum 25 feet)
- A carabiner
Step-by-step guide
- Find two trees. Both trees need to be 12 to 20 feet apart from each other.
- Throw one end of the rope over a branch on one of the trees. Tie the end of that rope to the trunk of the tree.
- Throw the other end of the rope on a branch on the other tree.
- Attach a carabiner to the rope between the trees. Attach the food bag onto the carabiner.
- Pull on the loose end of the rope. The bag will slowly start hoisting between the two tries.
- Tie the loose end of the rope to the other tree.
Look for branches that are at least 15 feet high.You don’t have to worry that much about the thickness of the branches here; however, it’d still be wise to stick with branches that won’t be able to support the weight of a bear nor branches that will break easily.
When you need to get something out of the bag, carefully untie the rope on one of the trees. Gently lower the bag on the ground – be careful, it may come crashing down if you do everything too fast!
Expectations vs. reality
Even though most of the methods look super easy, they could prove challenging for the total newbies in camping.
Here’s a short overview of things to pay attention to so the whole process goes as smooth as possible.
Finding the right tree
This is easier said than done. Some trees may be in an area that you won’t be able to reach or surrounded with water. On top of that, you’ll need to plan the whole campsite according to that one tree which may not always work out great.
That’s why it’s for the best to always go and reach campsite as early in the day as possible, so you’ll get more time to find an ideal spot right before the night falls.
Nightfall
In the event of you arriving late at the campsite, you may be tempted to not hang up your bear bag.
That probably won’t work out great – use every source of lighting you can find to get that bag high up on a tree!
The throw
Don’t expect to get the rope up on the tree on the first try – actually, it’ll very likely take you a while before you get it on the branch the way it’s supposed to be. Look for lonelier trees the first couple of times until you perfect your throw – thing will get much better afterward!
Other branches
If you happened to camp in too dense of a wood, your rope may end up getting stuck in other branches or trees more than a few times.
You’ll probably be tempted to give up and just leave everything on the ground, however, be patient with yourself – you’ll get it up there eventually.
Hanging it up
Hopefully, by now you’ve learned some tips or tricks that will come in handy on your next camping trip. Hanging a bear bag is not the easiest task when it comes to setting up your campsite but it sure gets easier with time – practice makes perfect, right?
Don’t forget to behave responsibly and take back home any parts of the bear bag mechanism, as they may be hazardous to animals and birds. As long as you always plan the day appropriately so you have enough time to set up the campsite, you should be able to fully enjoy your bear-free camping trip!
For more useful and safety tips on how to plan a backpacking trip, see our earlier article on this topic.