
How to Clean a Camelbak: Tips and Tricks to Drink Clean
Water bladders have been keeping people alive for centuries in some form or other. In fact, it is thought that ancient tribes were using water skins made from a sheep or cow bladders, as far back as 5000 years ago.
[the_ad_group id=”21″]
Though the materials have changed somewhat, modern hydration bladders work in much the same way. They’re ideal for hikers, backpackers, runners, cyclists and just about anyone who enjoys some sort of physical activity.
See also: Best Hiking Water Bottle: Stay Hydrated on the Trail
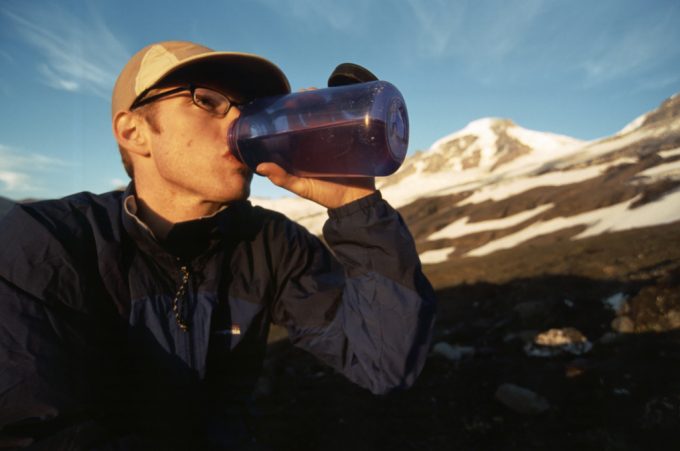
Modern designs are lightweight and can hold several liters of water at a time, allowing you to drink while on the move while keeping your hands free. It’s a useful piece of kit and with proper care and attention, a good water bladder will last for years.
Neglect to look after it however and your water will soon develop a strange taste and can possibly become harmful. The good news is that as long as you know how to clean a camelbak, it’s easy to keep them in top condition.

Cleanliness is next to godliness, or so we are led to believe, and it is an essential aspect of ensuring the longevity of your water bladder.
Below, we will discuss the dangers of not keeping on top of maintenance, as well as the various components and materials that make up a hydration bladder. Finally, we will look at how to clean a water bladder to ensure it will remain safe to use and free from harmful bacteria.
The dangers of neglect
Before discussing how to clean a hydration bladder, it’s useful to understand what can happen if you don’t. Neglecting to clean your water bladder can have serious consequences, especially if it’s your only means of hydration on a multi-day hike in the wilderness.

A dirty water bladder soon becomes a nesting ground for many types of harmful bacteria. Mold and mildew will soon make appearances, making your Camelbak look grotty as well as presenting a potential health risk.
The effects of mold and mildew
Some people will claim that they’ve been drinking out of their water bladder for years without cleaning it once. Sure there are some black patches and it’s a little slimy and the water tastes a bit iffy, but it hasn’t killed them yet. Mold, mildew, and bacteria affect people in different ways. While some suffer no ill health, others can have allergic reactions.
Generally, the majority of people who have drunk from a moldy water bladder have become nauseous and suffered diarrhea. This is followed by shakes and cold sweats.
Again different people have different reactions, but some can be ill for over a week, while others suffer just for a day. This is not the ideal condition to be in while out and about in the wilderness. Imagine you’re three days into the wilderness on a multi-day hiking trip and you become ill from your Camelbak.

You’re three days away from civilization and in no fit state to walk anywhere. Perhaps you don’t have any more water or food. While this is an extreme example, it is not an impossible eventuality.
Other effects
Aside from the more serious effects of mold and mildew, there are other reasons to keep your water bladder clean. Firstly the taste of your water will be affected by an unclean bladder. Everyone knows the “old water” taste. This isn’t the refreshing taste you need while out exercising and can put you off drinking as much as you should.
A water bladder that is neglected for too long can also become blocked. The tube and mouthpiece can be the worst affected areas, as it is generally the bacteria from your own mouth that gets into the vessel. A blocked tube is not only worrying but can prevent you from getting the water you need easily.

What’s in a water bladder?
The obvious answer here would be water, though some folks like to drink Gatorade or other energy drinks while exercising. However, we’re more concerned about what makes a water bladder.
There are many different brands of water bladders, with CamelBak being among the most well known. While there are some small differences between these brands, they largely follow the same formula.
The reservoir
This section makes up the bulk of the water bladder and is where the water is stored. It’s typically made from BPA free rubber or a flexible plastic. They range in size and can store anywhere between one and a half to ten liters of fluid at a time.
The tube
Delivering the fluid of your choice from the reservoir to the mouthpiece, it is this area that is most in danger of developing mold that you cannot see. It’s also the section that people neglect to clean most of all as it’s rather fiddly.

The mouthpiece
You guessed it, this is where you drink from. Most water bladders will use a bite valve to release the water, allowing the user to simply bite down on the mouthpiece to start the water flow.
Some systems also incorporate a shut-off valve to prevent leakages. This is the part of the whole thing that has the most “moving” parts and it’s worth cleaning thoroughly.
Cleaning techniques
There are a great many ways one can clean a water bladder, from quick rinses to full on deep cleans. It depends on how soiled the bladder is, or your own personal preference. The frequency of use also plays a part.
Prevention
Prevention is the best means of defense against mold and mildew. By taking a few simple steps each time you use it, your water bladder should require minimal deep cleans.
- Once you return home from your activity, empty the bladder completely.
- Rinse out the inside and allow fresh water to flow through the tube and mouthpiece.
- Empty completely and detach the mouthpiece from the tube.
- Wash the mouthpiece with warm soapy water, rinse and leave to dry completely.
- Take a dry cloth and wipe out the excess moisture in the reservoir, then remove the tube.
- Hang up the reservoir and allow to air dry.
- Remove the excess moisture from the tube (more information below) and hang up with the reservoir.
- When all the components are fully dry, fold them up and store in the freezer until the next time.
Deep clean
If you’re using your water bladder regularly it’s worth giving it a deep clean every six months or so. A deep clean is also necessary for a water bladder that has been filled with anything other than water.
Sugars left from energy drinks or fruit juices can breed bacteria and cause you many problems. Finally, if you’ve neglected your water bladder previously, a deep clean should get rid of anything dwelling inside.
- Again, empty the bladder fully and rinse out.
- Mix two or three ounces of white vinegar and two tablespoons of baking soda with enough warm water to fill the reservoir three quarters.
- Add the mix to the reservoir and give it a good shake to mix. You should hear the baking soda fizzing.
- Once the fizzing has stopped, allow the mix to sit for five minutes or so.
- Next, raise the bladder and pinch the mouthpiece to draw the liquid through the tube and into the mouthpiece.
- Let the liquid flow a bit before shutting off the valve and leaving the solution to sit in the bladder for at least half an hour.
- After this time empty the bladder and wash with warm water and detergent. Use brushes to scrub at the inside of the reservoir and tube. Also, don’t forget to clean the lid area thoroughly.
- Rinse thoroughly and dry with a cloth or towel. Allow to air dry fully and store in the freezer when finished.
The combination of vinegar and baking soda ensure that any mold spores and bacteria are killed during the clean. The baking soda removes any bad smells and tastes that may have developed or may be coming from new plastic. There are other popular means of cleaning a water bladder that follow the above method but substitutes the vinegar and baking soda.

Bleach
Many people use bleach rather than vinegar or baking soda. About two tablespoons should be adequate, but you will need to be sure to rinse the bleach out thoroughly. Using bleach can result in your water tasting and smelling a bit chemically.
[the_ad_group id=”22″]
It can also be dangerous to use and care should be taken not to spill any on your skin or in your eyes. While bleach is a popular choice, especially used in combination with baking soda, many feel that vinegar has all of the benefits of bleach, without the danger.
Denture cleaning tablets
The same tablets your grandparents use to store their dentures in overnight can also do wonders for your water bladder. One or two tablets dissolved in a warm water solution can be used to keep your water bladder sanitized.
These are easy to use and are more or less made up of the same ingredients the official CamelBak cleaning tablets are. They are, however, a fraction of the price.

Lemon juice
Many people swear by lemon juice as a means to rid your water bladder of mold and bacteria. Be sure to rinse out well though as you wouldn’t want to leave residual sugars within the bladder.
Official cleaning kits
CamelBak also sells cleaning kits, inclusive of two wire brushes, cleaning tablets, a hanging hook and two drier arms used to keep the reservoir open while drying. However, the tablets are remarkably similar to denture tablets and work as effectively.
The brushes are useful for cleaning the tube and inside the reservoir and the drying arms and hook are handy. The kit is worth considering for the tools, though in future, cheaper methods than the official tablets can be used.

Cleaning the tube thoroughly
If you suspect the tube is hosting mold, a biofilm or other gunk, it’s worth giving it a good scrub. Thin wire brushes can be bought for this purpose. If they’re not long enough, cut a length of fishing line to attach to it. Run this through the tube first and pull the brush in afterward, allowing you to clean the entire length.
If you can’t get hold of a wire brush that is thin enough, you can always use paracord. Simply cut a length that is longer than the tube and tie two or three knots at one end.
Feed the paracord in with afishing line or thin wire and scrub away. It’s a good idea to remove any gunk before soaking in a deep cleaning solution, so rinse out first, scrub and then move on to a deep clean.

Soiled water bladders
If you pick up your water bladder and find it covered in mold inside it is possible to kill the bacteria with a deep clean and scrub. First rinse with warm water, then scrub and finally follow the above deep cleaning method. After the clean, you might find that some black marks remain.
These stains are permanent but shouldn’t pose any further risk to you after deep cleaning. If you’re really concerned, it might be best to get a new bladder altogether.

What NOT to do
There are a few things that should be avoided when cleaning out your water bladder as you may cause more harm than good.
- Never fill your water bladder with boiling water as this can damage the materials.
- Avoid using iodine to clean the bladder out with as this can stain.
- Don’t use harsh chemicals such as chlorine. Not only are they not necessary, but they can be dangerous to you.
Drying and storage
With the entire bladder nicely cleaned, it’s time for the most important part. Most mold is born from a combination of air and moisture. If there is even a drop of moisture left in the bladder when you put it away, it’s likely to encourage mold, mildew, and bacteria. There are some tips and tricks, however, to prevent your water bladder from succumbing to such terrors!
Drying methods
The best way to dry your water bladder is to air dry it. If it’s done properly, this will ensure that every drop of moisture is eliminated.
- First of all, take the bladder apart. Starting with the reservoir, wipe off the excess moisture with a dry cloth or towel, in order to speed up the air-drying Be sure to get right into the corners if you can, and remember to rub the lid dry.
- Hang the bladder somewhere dry and out of direct sunlight, as this can break down the materials over time.
- You will probably find that the reservoir will close in on itself. It’s important to keep it open as much as possible to encourage air flow to each and every nook and cranny. This can be done in a number of ways if you don’t have the official drying arms.
- Bunch up some paper towels and place inside the reservoir, preventing the sides from closing. This has the additional advantage of soaking up any moisture where the towels are placed.
- Use a clean set of BBQ tongs. The spring design will ensure them, and the reservoir, remain open.
- More or less anything can be used here as long as it’s dry and clean. An old soda can work and is light enough not to drag the bladder down.
- Next, dry out the tube. Wipe the outside with a cloth or towels and simply whirl the tube around like a whip to remove the majority of the internal moisture. A dry brush or the knotted paracord mentioned previously can also be run through.
- Hang the tube up with the reservoir and leave for the air to finish the drying process. Make sure that the tube isn’t kinked anywhere and that air can flow all the way through.
- Finally, the mouthpiece can be wiped dry also. Use a Q tip to get inside and remove the worst of the moisture. Leave to air dry with the other components.
Once the air has done its job and you’re sure that there is not a drop of moisture left in the bladder, it’s time to put it away until next time. If you wanted to speed things up a bit, you can use a hair dryer on a low setting to dry everything out. Just be careful not to get too close as you may damage the material.

Proper storage
With your CamelBak completely dry it’s now safe to put away until the next time you need it. The ideal environment to store it in is one in which bacteria, mold and mildew cannot survive. Extremes of temperatures are your best bet, unless you have a completely sterile, quarantine room at your disposal!
Extremely hot temperatures will certainly prevent bacteria from surviving, though your water bladder probably won’t last very long either!

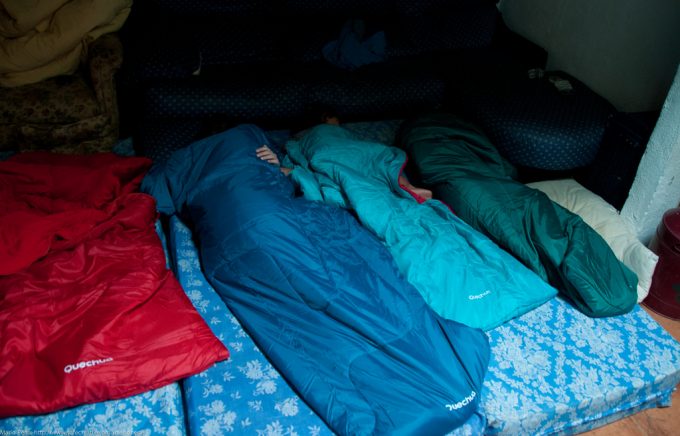
The safest place to leave your sparkling clean hydration bladder is in the fridge or freezer. Fold it up neatly, leaving the components detached and place in a spare section of the freezer.
It’s worth putting it in a plastic freezer bag to ensure the material doesn’t stick to the sides of the freezer or anything else. It can now be stored here indefinitely, with no danger of the materials becoming brittle and breaking down.
Other storage methods people use include leaving the bladder filled with the cleaning solution until you need to use it again.
This cuts out the lengthy drying process, however, depending on what the cleaning solution is made from, certain elements could be absorbed into the material, forever giving your water a strange taste. It’s a good option for short term storage and regular users, though it shouldn’t be used for extended periods of time.

Other people may suggest simply leaving it full, but again, after a certain period of time this is not a viable solution. The water will eventually go stagnant and you’ll most likely have to give it another deep clean before using it.
All in all
A water bladder really is a fantastic piece of kit to have on you in any outdoor situation. Now that you know how to keep it clean, you need never worry about this vital item letting you down again. Just remember that prevention is the key to longevity.
[the_ad_group id=”23″]
By taking a little bit of time and effort every time you return from using your water bladder, you will avoid mold and bacteria completely. Clean the mouthpiece off and be sure to dry everything thoroughly. It is a combination of moisture and air that allows bacteria to thrive, so eliminate this threat with proper drying and storage practices.

Even with frequent maintenance, it is worth carrying out a deep clean on your water bladder every six months or so. Now that you know how, be sure to look after your CamelBak. If you neglect it, it could be disastrous for you out in the wild!
For the best hydration bladder, see our article on this important topic.


Camelbak was my first water reservoir. I actually bought it for high school marching band. As I got more into hiking and cool gear I found the Hydrapack Shape-Shift. It is generally less expensive, and the design allows you turn the reservoir fully inside out to better clean it. It certainly beats the heck outta cleaning my old camelbak.
Thanks Mike for that! I too have a Camelback and what a great water reservoir it is! It is within my budget and it is quite durable too!