Ankle Strengthening: Exercises to Get Ready for the Trail
Hiking in nature is sure fun – nothing beats the feeling when you get to explore new trails. However, a lot of hikers set out physically unprepared and have their trips ruined by various injuries. Read on to learn how to do some basic ankle strengthening exercises and how to get ready for the trail while avoiding injuries at the same time.
If you’ve been worried about ankle injuries while hiking, you’re not alone. Many experienced hikers agree that the ankles are often one of the most vulnerable body parts, considering the rocky terrain and the extra weight on your back. Nothing ruins a good trip like a sprained ankle, right?
See also: Best Knee Brace for Hiking: Putting the Proper Support on Your Best Foot
The good news is that any possible injuries to your ankles – or to whatever else body part – shouldn’t stop you from hiking whatsoever! By putting in a minimal effort, you could easily get a strong body, suitable for any kind of trail.
Why are strong ankles important?
Setting out on a hiking trip without any type of psychical prep beforehand may not be the best idea ever. You’ll probably be doing yourself a huge favor if you invest some time in getting some strong ankles, as well as improving the overall strength of the muscles in your legs.
Strong ankles are especially important because that’s where most of the pressure goes during hiking, running or whatever other physical activity you’ll be doing. If there aren’t enough strong muscles to support you, an injury could happen at some point, leaving you not able to participate in your favorite outdoor activities.
On top of that, there’s this thing called proprioception – the ability of the human body to sense where it’s located in the space around it. If you work on increasing your proprioception, you’ll be able to control your body parts more effectively and limit the chances of injuries taking place.
Ankle strengthening exercises
Here’s a list of the most basic exercises that help strengthen your ankles. Most of them require no special equipment and can easily be done around the house. In order to achieve the best results, you’ll have to be diligent with your routine and work out on a regular basis.
To make sure you’re doing all of the workouts properly, it’s strongly advised you do them in front of a mirror, at least in the very beginning. That way, you’ll easily notice whether you’re doing something wrong while improving your body posture at the same time.
Calf Raises
The calf raises is one of the most basic workouts you can do around the house even if you haven’t exercised in years. It’ll help you get stronger calves and at the same time, make you improve your overall balance.
It’s pretty simple and straightforward – all you need to do is stand with your legs shoulder-width apart and start lifting your heels while standing on your tiptoes. Start off slowly and aim to hold yourself for at least 10-15 seconds on each lift.
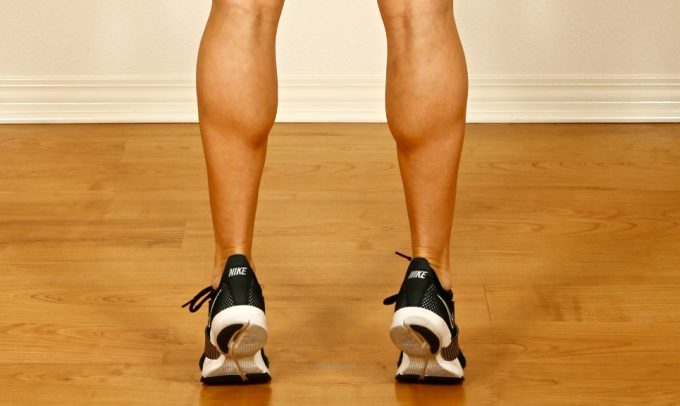
As you improve yourself, you can try lifting yourself higher and higher while extending the duration of the lift. For beginners, it’d be great to start off with 2 sets of 15 repetitions and work your way from up there. Each lift should last for around 10-12 seconds, though feel free to hold it longer if you can.
Squats/One Legged Squat
Doing some squats before your hiking trip is always a good idea as they will help you get better muscles in your legs as well. On top of that, the one-legged squats are an excellent choice when it comes to ankle strengthening, as they’re very simple and yet efficient.
If you’re a total beginner, it’s probably for the best to start doing regular squats first and once you get used to those, continue with the one-legged squats. In order to do the one-legged squats, you’ll need to squat with one leg in front of the other, stay like that for a while and then change legs.
Start without any extra weights and be careful – stop if you feel any discomfort in the ankles or the knees. Ideally, you’ll want to do 3 sets with 10 repetitions the first few times and then slowly increase speed and repetitions with time.
Pay attention to your back – you need to hold it neutral and straight no matter the type of squat you do. Basically, focus on working with the lower part of your body to do the squats appropriately – don’t just bend forward with your torso as any inappropriate practice could lead to injuries.
The grapevine
The grapevine is a great exercise choice if you want to work on your agility a bit. Agility is especially important if you’re hiking on uneven or rockier terrains where there are bigger chances of you stumbling upon something and hurting yourself.
The main goal of the grapevine is to run from side to side in a crisscross way while bending your knees, though if you don’t feel quite comfortable with that, you can first work on learning the steps before you move on to bending your knees as well.
You start off by crossing one foot in front of the other and then back behind as you move. If you want, you could move faster and get a cardio workout meanwhile.
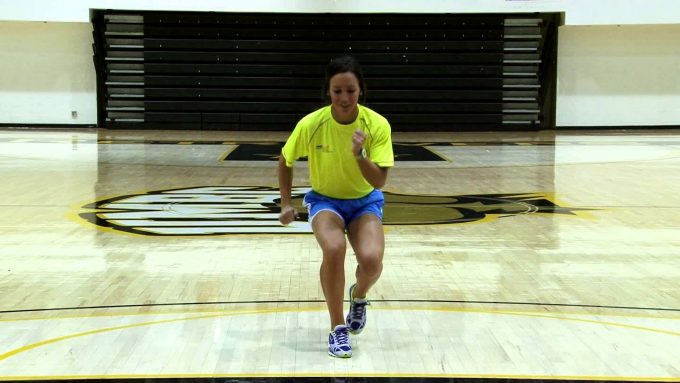
It’d be good to begin with 5-7 minutes and increase time and speed as you get more comfortable with the steps. Soon enough, you’ll notice the difference not only in your ankles but in your calves and shins as well.
Tap Downs
Tap downs are a terrific choice for improving the muscle strength on all of your lower body, all the way from the hip to the ankle. In order to do the tap downs, you’ll need to get yourself a platform, preferably at least 2 inches high; be careful if you choose to replace the platform with a random object from around the house, as that may lead to injuries.
For the tap downs, the first step is to get yourself up on the platform and place your hands on your hips; don’t forget to keep your chest open. Slowly start lowering one of your heels toward the ground while keeping your hips parallel. Your knees may get wobbly and feel weak at this point but don’t give up – it will go away with time!
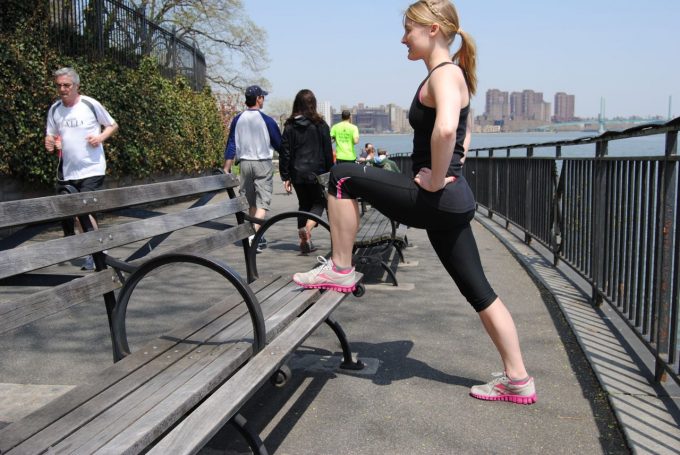
Once you’re done with one leg, raise back up and switch legs. You can alternate between lowering both legs at the same time or choose to first do one set with one leg, and then switch – it’s up to you to find whatever works the best for you. Aim to do at least 1 set per leg with 10 repetitions if you’re a total workout newbie. For maximum results, go for 3 sets of 15 repetitions.
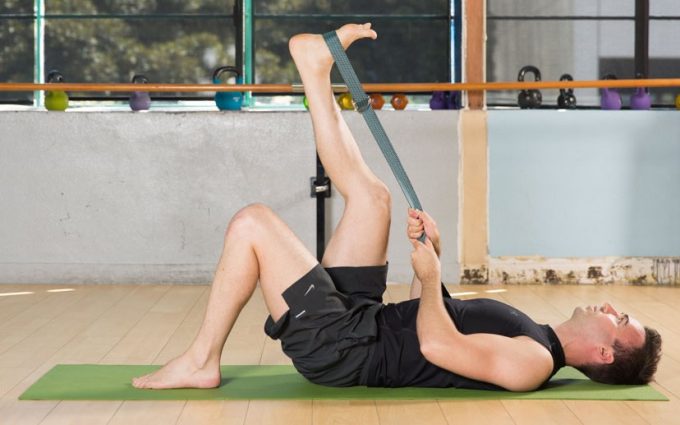
Resistance band workout
Including a resistance band workout in your exercise routine will do wonders for your stability on the trail and it’ll also protect your connective tissue from any injuries. Before starting out, don’t forget to pick a band that will provide you with the suitable resistance for your fitness level – most of the bands on the market are color-coded for easier recognition.
There are many variations in the way you can do this. One way to do it is to sit on a chair and wrap a resistance band around your foot while holding the band with your hands at the same time. Start rotating your ankle inward and outward while holding the same level of resistance with your hands.

This isn’t a challenging workout and almost anyone can do it. For better results, do this exercise daily and opt for at least three sets of 10 repetitions. When you start noticing improvement, you can start using a band with a higher resistance.
Jumping rope
Jumping the rope is an intermediate activity for the most part. However, some may find it challenging and could need a bit extra time to get used to it. To get started, all you’ll need is a nice jumping rope – don’t forget to check whether it matches your height, as you won’t be able to do the exercise properly if it doesn’t.
There are various ways that you can do the actual jumping. You can do both legs at the same time, do some hops or if you want to take things up a level, jump to the sides with both legs. It’d be good to first focus on getting your balance right and working on not tripping the whole time – but don’t get discouraged even if you don’t get it right straight away!

For the absolute beginners, try and jump the rope for 1-3 minutes straight. There’s no need to rush – set a pace you feel most comfortable with the first few tries and slowly increase it. Once you master it, you’ll notice improvement not only in your ankles but in your posture, core, and abs!
Balance it out
Working to improve your balance will help you significantly on the trail and should be a key part of your ankle workout. Most of the balance exercises are so simple, you can even do them anywhere around the house or in the yard – some even prefer to do them on their lunch break at work!
For beginners, it’d be most suitable to start standing on one leg only. Try doing it for as long as you can but don’t expect to be able to do it for a big amount of time in the beginning – it’s definitely more challenging than it sounds! Aim to reach at least 30 seconds per leg and prolong the time as you start improving.
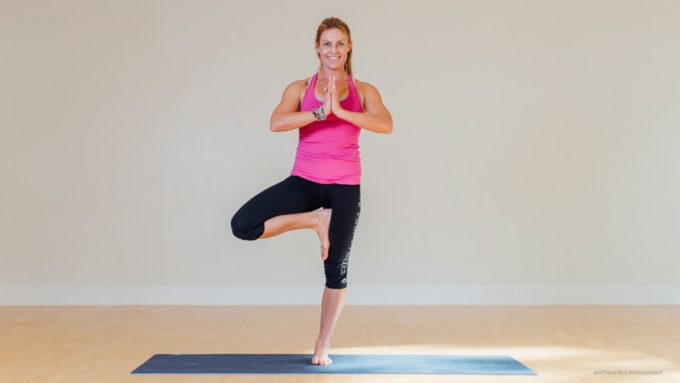
Balance should largely improve your proprioception and help you maneuver any trails in nature with ease. Once you start feeling confident enough, you can spice things up a notch and start doing all of the balance exercises with your eyes closed. For those of you more experienced, you can even try and spread your arms, though this is far from mandatory.
How to avoid injuries
There are a few extra things you can do to have a better hiking experience and minimize the chances of any injuries going on.
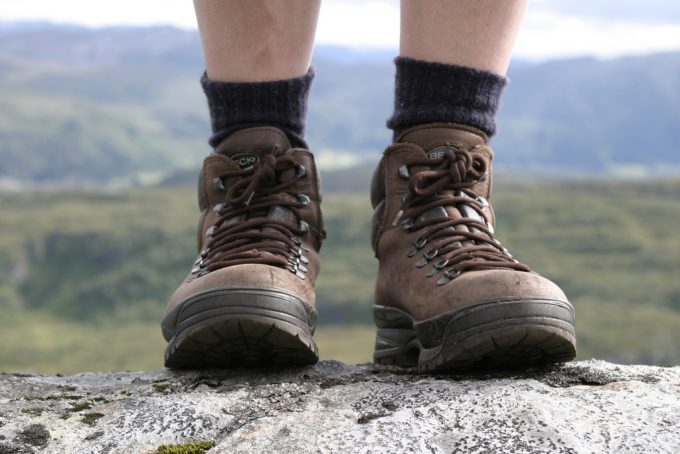
Pick your shoes wisely
The shoes you wear hiking can be either your best friend or your biggest foe. Setting out on the trail in a pair of worn running sneakers is never a good idea – do the investment and get yourself a decent pair!
For a better ankle support, choose hiking boots, as those go higher around the ankle and generally feel sturdier. However, some hiking shoe models could come with a decent level of ankle support, so think about giving those a chance. See our expert review of the top backpacking shoes to learn more.
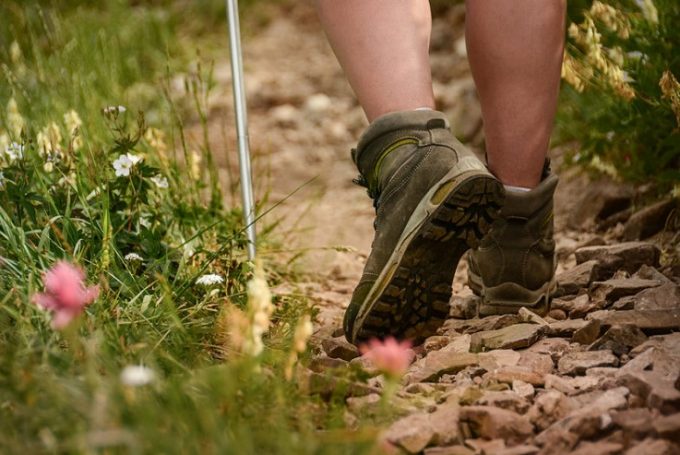
If you’re going on a slippery terrain, pick shoes with a rugged sole so you’ll feel more secure. In the case you’ve ever had an ankle injury that sometimes flares up, you can give your ankles some extra support by wearing an ankle brace.
Get to know the trail
Knowing the trail you’re going to hike on can drastically help you prepare for any challenges beforehand. Try to look it up and see what the terrain is like and whether there are some riskier spots where you’ll want to pay some extra attention.
Even though being adventurous works great most of the time, don’t push yourself too much when it comes to exploring a new trail. If you’ve never hiked there before or you’re going hiking in bad weather conditions, it’s probably for the best to call someone to join you.
Bring trekking poles
Trekking poles are often overlooked by the amateur hikers even though they can be a true blessing not only for your ankles but for your knees as well! No matter whether you’ve had any sorts of injuries in the past or just want to improve your speed, they’ll be a great addition to your hiking equipment.

They come in handy for all sorts of terrains, though you’ll get the most out of them on downhills and slippery surfaces when all of the extra support is more than welcome. When used for climbing, the trekking poles lower the impact that would otherwise go to your knees or ankles and thus make the climb easier. For the top trekking poles you can use, see our must-read article on this.
If you’re worried about hauling some extra weight with you, do know that the trekking poles are designed to be lightweight and most of the models on the market are foldable, making them super-convenient for your next hiking trip.
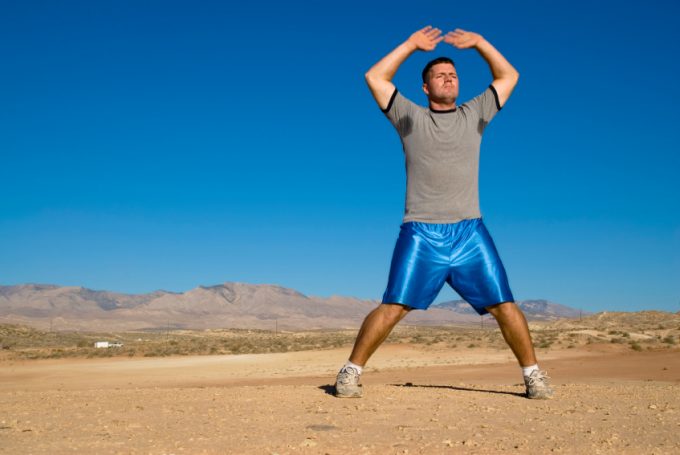
Warm up & cool down
Many make the mistake and set off on a demanding hiking trip not only without the necessary psychical preparations beforehand but without a decent warm up. Even though it may not feel like it, hiking is a demanding cardio activity and you should treat it as such.
Start off your hiking trip by doing some basic cardio workouts to get your body warmed up for the challenges ahead – even a few jumping jacks before can make a world of a difference up in the mountains!
Once you reach your destination, it’ll probably be tempting to just sit down and just do nothing for a while, however, you could regret that decision soon. After each hike, it’s crucial to stretch so your muscles relax and your body has enough time to slowly cool down.
Stop if in pain!
Hikes and backpacking trips should be all about fun. Whenever you’re on a hike and you feel some sort of pain going through your ankle – or any other body part, for that matter – stop immediately and take a break. If you think you’ve somehow strained or hurt your ankle, sit down and lift your leg up, so any swelling can go down.
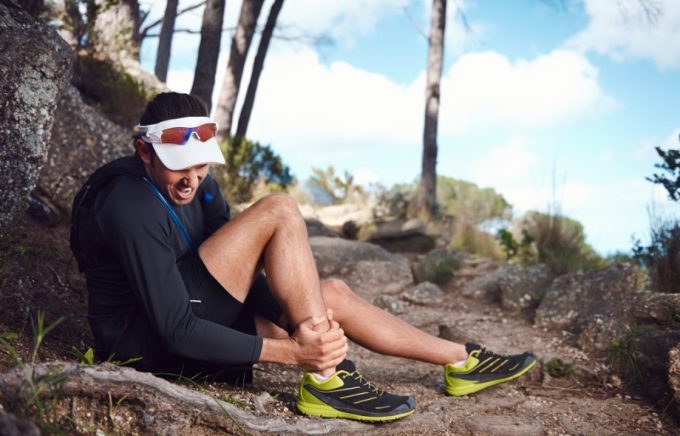
Some hikers may feel tempted to continue moving even though they’re in discomfort; however, remember that continuing hiking with a strained ankle may worsen up your condition and bring on unnecessary complications to your health.
If you’re feeling pain but think you’re strong enough to finish the trip and go back home, try and walk sideways – this works well for your ankles especially on steeper, downhill terrains.
Step up your game
Working on strengthening your ankles is strongly recommended, however, don’t forget about other body parts – legs, core, abs, and so on. Since hiking is a demanding activity, it’s important to try and be physically active at least 2-3 times per week so you get to be in top shape all the time.

On top of that, planning for healthier meals both on and off the trail will drastically improve your game and allow you to feel lighter and faster on the trail. Go for meals that are high not only in calories but in nutritional value as well and that will provide you with all of the necessary nutrients throughout your trip.
Last but not least, remember that all of the results you’ve been hoping to see take time. Great results don’t just happen overnight and building up muscle strength is definitely not easy. As long as you’re persistent and don’t give up on the first couple of tries, success is almost guaranteed!
Are you a newbie in hiking? Check out our tips on the best workouts for hiking to learn more.